

Spring changes two things for nails. Hands come out of gloves and back into daylight, and the shades that dominate the season — pastels, sheers, soft neutrals — are the least forgiving to apply. Pastel pigments carry a low load, which is why they streak on the first coat and need a second. Sheers conceal nothing underneath. Both reward preparation more than any winter shade did.
There is a second seasonal point worth making, since a good manicure draws the eye straight to the backs of the hands. The Skin Cancer Foundation notes that around 90 percent of the skin changes associated with ageing — wrinkles, brown spots, textural change — are attributable to sun damage, and that hands are chronically exposed while sunscreen is seldom reapplied after washing. Spring is when that exposure resumes. The designs below cover the range from bare sheer to hand-painted detail.

Soft Pastel French Tips
Swapping white for lavender, mint, or baby pink keeps the French structure and lightens it. Guide stickers give a clean smile line without brush control, and painting with the finger turned sideways lets the brush follow the free edge rather than fight it. Expect two coats — pastels rarely cover in one.
Styling Tips
- Use a different pastel on each nail
- Keep the base sheer pink or nude
- Turn the finger sideways when painting the tip
Why It Works
Colour hides an uneven line better than white does.
Best Materials/Colors
Pastel gel polish, nude base, guide stickers

Floral Accent Nails
Hand-painted florals are billed by time, so decals cost a fraction. The catch is that decals repeat across fingers unless placement is varied deliberately. Keeping flowers to one or two nails is what stops the hand reading as busy, and sealing every decal edge prevents lifting within days.
Styling Tips
- Keep flowers under three millimetres
- Vary decal placement between fingers
- Seal every edge under the top coat
Why It Works
Restraint on placement keeps detail from becoming clutter.
Best Materials/Colors
Detail brush or decals, nude base, pastel shades

Glossy Milky White Nails
Milky white is translucent rather than opaque, built across two or three sheer coats until the nail looks lit from beneath. That translucency magnifies every ridge underneath, so a smoothing base matters more here than with any solid shade. Over a poorly prepared nail it reads chalky rather than luminous.
Styling Tips
- Build across two or three sheer coats
- Smooth ridges before the first layer
- Finish with a high-gloss top coat
Why It Works
Softer against spring clothing than a stark white.
Best Materials/Colors
Milky white gel polish, ridge-filling base coat

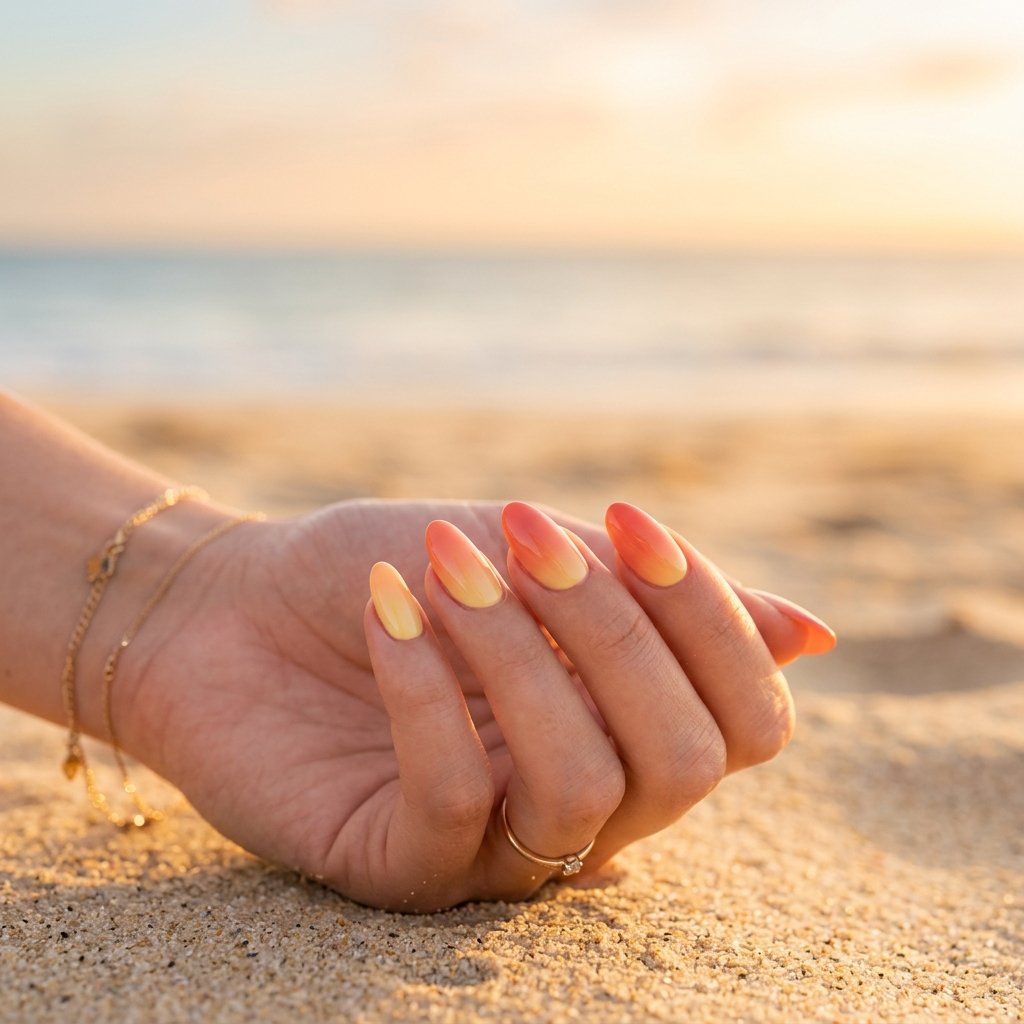
Peachy Ombre Nails
A sponge blends peach into soft pink across three light passes. One heavy press leaves a visible edge instead of a fade. Because the two shades sit close together in lightness, blending errors barely register — which makes this among the more forgiving gradients to attempt at home.
Styling Tips
- Build the fade across three light dabs
- Paint both shades onto the sponge, not the nail
- Expect to use a fresh sponge each time
Why It Works
Low contrast between shades hides blending mistakes.
Best Materials/Colors
Peach and pink gel polish, make-up sponge

Tiny Heart Nail Art
A heart is two dots placed side by side with a tail drawn down between them. A dotting tool handles both steps, so no brush skill is involved. Working small keeps it elegant — hearts under three millimetres read as detail, larger ones read as novelty.
Styling Tips
- Place two dots, then drag a tail downward
- Keep hearts under three millimetres
- Limit to one or two accent nails
Why It Works
Built from dots rather than drawn freehand.
Best Materials/Colors
Red or pink polish, nude base, dotting tool

Lavender Dream Nails
Lavender suits both warm and cool skin, which is unusual among pastels and part of why it recurs every spring. It does show tip wear sooner than a nude, because contrast against the nail bed is higher and a chip has nowhere to hide. Two thin coats prevent the streaking a single thick coat guarantees.
Styling Tips
- Apply two thin coats to avoid streaking
- Try matte for a softer, chalkier finish
- Keep the shape soft almond
Why It Works
One of the few pastels that suits every undertone.
Best Materials/Colors
Lavender gel polish, matte or gloss top coat

Minimal Gold Foil Nails
Foil presses into a tacky layer and seals underneath. Irregular fragments are the appeal, so scattered placement beats deliberate arrangement. Tweezers work better than fingers, since foil sticks to skin. Foil also disguises wear as the set ages, because the pattern was never uniform to begin with.
Styling Tips
- Scatter foil rather than arranging it
- Handle it with tweezers, not fingertips
- Seal thickly over every raised edge
Why It Works
Random placement cannot be wrong.
Best Materials/Colors
Gold foil flakes, clear gel, nude polish

Baby Blue Nails
Light blues have the lowest pigment load of any pastel and streak more visibly than the rest. Two thin coats fix what one thick coat makes worse. The shade also shifts under warm indoor lighting, reading greyer than it does in daylight — worth checking before committing all ten nails.
Styling Tips
- Test one nail in daylight before doing all ten
- Apply two thin coats to stop streaking
- Use a square or oval shape
Why It Works
Cool tone reads fresh against spring clothing.
Best Materials/Colors
Baby blue polish, white nail art pen

Abstract Swirl Nails
Swirls are drawn freehand with a liner brush, and the absence of a correct version is what makes them forgiving. Line weight decides the character more than colour does — a consistent thin line reads graphic, varying thickness reads hand-drawn. Drawing in one continuous motion avoids the blobs that stopping creates.
Styling Tips
- Draw in one continuous motion
- Limit to two or three pastel shades
- Keep the base sheer nude
Why It Works
No correct version exists to fail against.
Best Materials/Colors
Fine liner brush, pastel gels, nude base

Glossy Nude Nails
The plainest option here, and the one where application shows most clearly. With no pattern to distract, the cuticle line becomes the focus. Leaving a hair’s width of bare nail at the base separates a neat manicure from a flooded one, and a brush dipped in remover cleans up any overrun.
Styling Tips
- Match the nude to skin undertone, not shade name
- Leave a hair’s width clear at the cuticle
- Cap the free edge to slow chipping
Why It Works
Hides a chip better than any colour on this list.
Best Materials/Colors
Nude polish, gel top coat

Daisy Chain Nails
Five dots in a ring with a sixth in the centre produces a daisy, so no petal shapes need drawing. Letting the white petals dry before adding the yellow centre stops the two colours bleeding into one another. That single pause is the difference between a flower and a smudge. The same dotting technique underpins several designs in this guide to beginner nail art.
Styling Tips
- Place five dots in a ring, then one centre
- Let petals dry before adding the centre
- Keep the base soft pink or nude
Why It Works
Built entirely from dots, with no brushwork.
Best Materials/Colors
White and yellow polish, dotting tool

Coral Pop Nails
Coral sits between pink and orange and carries far more pigment than the pastels above, so it covers in one or two coats without streaking. Bright pigments do fade under sunlight faster than neutrals, which matters as outdoor hours increase. A set worn on holiday looks noticeably duller after a fortnight.
Styling Tips
- Pair with fine gold line detail
- Expect some fading with sun exposure
- Try a square or soft coffin shape
Why It Works
Covers evenly where pastels streak.
Best Materials/Colors
Coral gel polish, gold foil or liner

Sheer Pink Gloss Nails
Sheer pink conceals nothing, which makes it the best test of whether the nail underneath is in condition. Ridges, staining, and a ragged free edge all show straight through. It rewards a few weeks of cuticle oil more than any other finish here, and it is the lowest-maintenance option once the nail is in shape.
Styling Tips
- Use cuticle oil daily for two or three weeks beforehand
- Buff ridges before applying
- Build across two sheer layers
Why It Works
Reads as healthy nails rather than polish.
Best Materials/Colors
Sheer pink polish, high-gloss top coat

Chrome Pastel Nails
Chrome powder buffs into a cured gel layer, which makes this gel-only work. Over a pastel base the finish lands closer to pearl than mirror. The powder magnifies whatever sits beneath, so the base must be filed level first. Curing and sealing steps are covered in more depth in this guide to gel nail designs.
Styling Tips
- File the base level before buffing on powder
- Choose a pastel rather than white base
- Seal immediately after buffing
Why It Works
Adds dimension to a flat pastel without artwork.
Best Materials/Colors
Chrome powder, pastel gel polish

Mint Green Nails
Green pigments shift against skin more than any other family, so a mint that looks fresh in the bottle can read grey or yellow on the hand. Testing on one nail before committing to ten saves a full removal. Cool undertones suit paler post-winter skin particularly well.
Styling Tips
- Test on one nail first — green shifts against skin
- Pair with small white accents
- Works especially well on short nails
Why It Works
Cool tone reads crisp rather than sweet.
Best Materials/Colors
Mint green polish, glossy top coat

Butterfly Nail Art
Butterflies are among the hardest shapes to paint and the easiest to apply as decals. Translucent wings layered under a top coat produce the floating effect; opaque decals sit flat and read as stickers. Pressing them down with a rubber-tipped tool rather than a fingertip avoids fingerprints in the layer beneath.
Styling Tips
- Choose translucent decals over opaque
- Press down with a rubber-tipped tool
- Limit to one accent nail
Why It Works
Translucency creates depth that flat decals cannot.
Best Materials/Colors
Butterfly decals, pastel base, thick top coat

Glitter Gradient Nails
Glitter concentrated at the tip, fading toward the centre. Density builds across passes rather than in one heavy application, which is what separates a gradient from a band. Removal runs longer than for plain colour, since glitter resists acetone — worth knowing before a soak at home.
Styling Tips
- Build density across three passes
- Keep the base nude or pastel
- Allow extra soaking time at removal
Why It Works
Sparkle without full coverage, and it hides tip wear.
Best Materials/Colors
Glitter polish, nude base, sponge

French Tip with Flowers
A French tip with a small flower placed where the tip meets the base. The order matters: the tip cures first, then the flower goes on top, so a wobble can be wiped before setting rather than ruining the line beneath. Keeping the flower to one or two nails preserves the structure.
Styling Tips
- Complete and cure the tip before adding flowers
- Keep the base sheer nude
- Use a fine brush or small decals
Why It Works
Familiar structure carries the unfamiliar detail.
Best Materials/Colors
White polish, fine brush, nude base

Jelly Nails
Jelly relies on translucent layers so colour deepens while staying see-through. Regular polish cannot hold this — it either covers or streaks. The transparency creates one specific issue: any lifting at the cuticle shows through the nail rather than hiding beneath colour.
Styling Tips
- Build colour across three sheer layers
- Cure each layer fully before the next
- Watch for lifting, which shows through
Why It Works
Depth that opaque polish cannot produce.
Best Materials/Colors
Translucent jelly gel polish

Soft Matte Pastels
A matte top coat strips the shine and mutes whatever sits underneath, so a pastel chosen under gloss reads a level deeper once flattened. Matte also shows fingerprints and hand cream far more readily than gloss, and it wears off sooner — usually needing a refresh before the colour does.
Styling Tips
- Expect the shade to read one level deeper
- Avoid hand cream immediately before photographs
- Keep the design plain to suit the texture
Why It Works
Texture replaces decoration entirely.
Best Materials/Colors
Pastel polish, matte top coat

Polka Dot Nails
Loading the dotting tool once and placing three or four dots in sequence gives a natural graduation in size. Redipping between every dot produces wildly uneven ones. Letting the base dry fully first stops the dots sinking and blurring into the layer beneath.
Styling Tips
- Load the tool once, then place several dots
- Let the base dry fully before dotting
- Keep the base neutral so dots read clearly
Why It Works
Uneven dots still look intentional.
Best Materials/Colors
Dotting tool, contrasting polish, neutral base

Rainbow Pastel Nails
One pastel per nail, with the effect appearing only when the hand is seen as a whole. Keeping the shades within a similar lightness is what makes it read as designed rather than random. One noticeably darker nail breaks the sequence and looks like a mistake.
Styling Tips
- Choose five shades of similar lightness
- Order them so neighbours sit close on the colour wheel
- Finish with one gloss coat across all five
Why It Works
No tools required, and it uses existing bottles.
Best Materials/Colors
Pastel polish set, glossy top coat

Pearl Accent Nails
Pearls sit proud of the nail and catch on clothing. Half-pearls hold better than full spheres, and setting them into uncured gel beats gluing onto a finished surface. Placement near the cuticle keeps them clear of the knocks that dislodge tip-mounted stones.
Styling Tips
- Use half-pearls rather than full spheres
- Set them into uncured gel, not onto dry polish
- Place near the cuticle rather than the tip
Why It Works
Texture without any colour or artwork.
Best Materials/Colors
Flat-back pearls, milky base, adhesive gel

Marble Effect Nails
Veining is drawn into a wet layer with a fine brush, then blurred before it sets. Timing is the whole skill — drawn too early the lines spread and muddy, left too late they read as hard strokes rather than stone. Every nail comes out different, which is intended and forgiving.
Styling Tips
- Draw veins into a wet layer, then blur
- Use the finest brush available
- Add fine gold veining for warmth
Why It Works
No two nails match, which reads as bespoke.
Best Materials/Colors
White and grey polish, fine brush

Negative Space Nails
Leaving part of the nail bare is less work than covering it, which makes this the rare design that saves time. Bare nail shows every ridge and stain, though, so a clear base coat still goes down across the whole surface. Skipping it is why negative space sometimes reads unfinished rather than deliberate.
Styling Tips
- Apply a clear base over the bare section too
- Use tape for clean boundaries
- Keep the painted shape simple
Why It Works
Less painting than a full manicure, and it grows out well.
Best Materials/Colors
Nail tape, clear base coat, one accent colour

Soft Beige Nails
Beige carries a warmer undertone than most nudes, which suits skin that has paled over winter better than a cool taupe does. It is also the most forgiving finish here for regrowth, since the contrast against the nail bed at the cuticle is minimal. Three to four weeks is realistic before the line shows.
Styling Tips
- Match the beige to skin undertone
- Keep the finish glossy for depth
- Suits short nails particularly well
Why It Works
Grows out with almost no visible line.
Best Materials/Colors
Warm beige polish, gloss top coat

Conclusion:
Spring shades are harder to apply than winter ones, and the reason is consistent. Pastels carry low pigment and streak on a single coat. Sheers conceal nothing beneath them. Both need two thin layers rather than one thick one, and both reward a smooth nail plate underneath more than any deep colour would.
Three habits carry across all twenty-six designs. Two thin coats rather than one thick. A hair’s width of bare nail left at the cuticle instead of flooding it. And a capped free edge, which roughly doubles the time before chipping starts. Beyond the manicure itself, the season brings hands back into daylight — which makes sunscreen on the backs of them the one piece of upkeep that outlasts any polish.

Leave a Reply