

Most nail art that looks difficult is not. The designs that go viral tend to be the ones a beginner can execute with a toothpick and two bottles of polish, which is exactly why they spread.
What separates a home manicure from a salon one is rarely the design. It is the application underneath it. A perfect polka dot pattern still looks amateur if the base coat is thick, the cuticle is flooded, or the free edge is left uncapped.
One worry is worth settling first. Harvard Health states that nail polish itself does not harm fingernails. Leaving it on for several weeks at a stretch can dry the surface, producing chalky white patches, and acetone removers dry the nail and surrounding skin. Practising on natural nails is fine. Leaving the practice on for a month is what causes trouble.
The other useful fact is physical. Polish dries by solvent evaporation, working from the surface downward. A thick coat therefore skins over on top while staying soft underneath, and dents hours later. That single mechanism explains most beginner problems on this list.
Below are thirty designs, each with the technique that makes it work and the specific point where home attempts usually fail.

1. Classic Polka Dot Nails
Dots are the easiest form of nail art because a circle needs no brush control. Pressing a rounded tool straight down and lifting cleanly produces one every time.
Dot size depends entirely on tool size, not on pressure. A bobby pin head, a toothpick, and a hairpin all give different diameters, which is how a single design gets variety. Working while the base is fully dry stops the dot sinking and spreading.
Styling Tips
• Press straight down and lift, never drag
• Use different tool sizes for varied dot diameters
• Let the base coat dry fully first or dots will bleed
Why It Works
• No brush control required
• Uneven spacing reads as deliberate
• Works at any nail length
Best Materials / Colors
• Pastel pink base polish
• White polish for the dots
• Dotting tool, toothpick or bobby pin

2. Minimalist Stripe Nails
A straight line freehand is harder than it looks. Striping tape removes the difficulty entirely by masking off the edge.
The tape has to come off while the polish is still wet. Waiting until it dries pulls the edge up with the tape and leaves a ragged line, which is the single most common failure with this design.
Styling Tips
• Lay striping tape over a fully dry base
• Peel the tape away while the top colour is wet
• Vertical lines lengthen the nail visually
Why It Works
• Tape does the precision work
• One extra colour transforms a plain manicure
• Suits professional settings
Best Materials / Colors
• Nude or beige base polish
• Gold or black for the lines
• Striping tape, or a fine liner brush

3. Glitter Accent Nail
Glitter on one nail rather than ten is a deliberate choice, not a compromise. It also happens to hide an uneven application, since the particles break up the surface.
Two thin glitter coats read denser than one thick one, because the pieces settle at different depths. A generous top coat then smooths the texture, which glitter otherwise leaves rough enough to catch on fabric.
Styling Tips
• Apply glitter to one nail only
• Build two thin coats rather than one heavy one
• Seal with a thick glossy top coat to smooth the texture
Why It Works
• Sparkle without a full set to match
• Particles disguise brush marks
• Removal only affects one nail
Best Materials / Colors
• Silver or champagne glitter polish
• Nude base for the other nine nails
• Glossy top coat

4. Soft Ombre Nails
A make-up sponge does the blending. The two colours go onto the sponge side by side, then get dabbed onto the nail rather than wiped.
Dabbing is the whole technique. Wiping smears the colours into a muddy band instead of a gradient. Three light passes build the fade; one heavy pass never does. Low-contrast pairs like pink and white forgive mistakes that a high-contrast pair would expose.
Styling Tips
• Dab, never wipe, with the sponge
• Choose two close shades for the most forgiving fade
• Expect polish on the skin — clean it up afterwards
Why It Works
• The sponge does the blending
• Errors barely register at low contrast
• Reads as a salon technique
Best Materials / Colors
• Baby pink polish
• White polish
• Make-up sponge and a small brush with remover for cleanup
5. Tiny Heart Nail Art
A heart is two dots and a drag. Place two dots side by side, then pull a toothpick down through the join to form the point.
The drag has to happen while both dots are wet. A second too late and the point tears rather than tapers. Practising on paper first costs nothing and settles the timing.
Styling Tips
• Make two dots, then drag down through the middle
• Work while the dots are still wet
• Keep hearts to one or two nails
Why It Works
• Built from dots rather than drawn
• Small scale hides imprecision
• Reads clearly even on short nails
Best Materials / Colors
• Nude or sheer pink base
• Red or deep pink for the hearts
• Dotting tool and a toothpick

6. Matte Minimal Nails
A matte top coat changes any colour without adding a single technique. It is the cheapest transformation available.
Matte hides brush strokes that gloss exaggerates, which makes it forgiving for beginners. It also shows fingerprints and hand cream far more readily, so cream goes on before the manicure rather than after. Colours read a shade deeper once flattened.
Styling Tips
• Apply matte top coat over any colour
• Expect the shade to read deeper than it did glossy
• Apply hand cream before, never after
Why It Works
• Hides brush marks gloss would reveal
• One extra product, no new skill
• Makes an ordinary colour look considered
Best Materials / Colors
• Matte top coat
• Dusty rose or mocha brown polish
• Base coat underneath

7. French Tip with a Twist
Only the tip gets painted, which cuts the difficulty in half compared with a full design.
Guide stickers give a clean curve without any brush skill. Freehand works too, using the brush sideways rather than pointing it — a flat edge draws a cleaner line than a tip does. Checking the curve in daylight before the top coat catches most errors.
Styling Tips
• Use guide stickers for a clean curve
• Freehand with the brush held sideways, not pointed
• Swap white for pastel blue, lavender or peach
Why It Works
• Only a fraction of the nail needs painting
• Colour updates a familiar shape
• Suits any nail length
Best Materials / Colors
• Sheer pink or nude base
• Pastel polish for the tips
• Guide stickers or a fine liner brush

8. Gold Foil Accent Nails
Foil needs a tacky surface to grip. It goes onto a nearly-dry top coat, or onto dedicated foil glue, and is pressed rather than placed.
Random placement genuinely looks better than deliberate placement, which makes this the most error-tolerant design on the list. Sealing over the top matters, since exposed foil edges lift within a day.
Styling Tips
• Press foil onto a tacky, not wet, surface
• Scatter it randomly — even placement looks worse
• Seal fully, since exposed edges lift
Why It Works
• Irregularity is the intended effect
• Mistakes are indistinguishable from design
• Disguises wear as the days pass
Best Materials / Colors
• Gold nail foil
• Nude or milky white base
• Thick top coat to seal

9. Pastel Rainbow Nails
Five colours, one per nail, and no artwork at all. This is the lowest-skill design here.
The choice that matters is tonal consistency. Five pastels of similar lightness read as a harmonious set; mixing a pastel with a saturated shade breaks it. Holding the bottles side by side before starting settles it in seconds.
Styling Tips
• Use five shades of similar lightness
• One colour per nail, two thin coats each
• Check the bottles side by side before starting
Why It Works
• No tools beyond the polish brush
• Colour does all the work
• Uses up existing bottles
Best Materials / Colors
• Pastel polish set — blue, lavender, mint, peach, pink
• Base coat
• Glossy top coat

10. Negative Space Nails
Leaving bare nail visible means less painting, not more. That makes negative space genuinely easier than full coverage.
It also demands a clean nail surface, since nothing hides ridges or staining. A base coat is not optional here — bare nail that has been stained by a previous dark polish shows immediately.
Styling Tips
• Leave part of the nail unpainted
• Use tape or stickers to define the edge
• Apply a base coat first — bare nail shows every stain
Why It Works
• Less painting than a full manicure
• Reads as modern and deliberate
• Regrowth is far less visible
Best Materials / Colors
• Clear base coat
• Black or white liner polish
• Nail tape and clear top coat

11. Minimal Half-Moon Nails
The curve at the cuticle comes from a hole-reinforcement sticker, the kind sold for paper files. Placed upside down, the curve is already perfect.
Half-moons suit short nails particularly well, because the unpainted crescent creates the impression of a longer nail bed. The sticker must sit on a fully dry base or it lifts colour when peeled.
Styling Tips
• Use hole-reinforcement stickers upside down as a guide
• Place them on a fully dry base
• Pair nude with white or gold
Why It Works
• A stationery sticker gives a perfect curve
• Lengthens the look of the nail bed
• Grows out more gracefully than a tip design
Best Materials / Colors
• Nude polish
• White or gold polish
• Hole-reinforcement stickers

12. Simple Daisy Flower Nails
A daisy is five dots around a sixth. Nothing gets drawn.
Placing the five petals first and adding the yellow centre once they have dried stops the colours bleeding into one another. Petals touching each other read as a flower; petals with gaps read as scattered dots, so keeping them tight matters.
Styling Tips
• Make five petal dots touching each other
• Add the yellow centre once petals have dried
• Keep daisies to one or two nails
Why It Works
• Six dots, no drawing
• Instantly recognisable shape
• Suits pastel bases and warm seasons
Best Materials / Colors
• White polish for petals
• Yellow polish for centres
• Mint, baby pink or sky blue base

13. Color Block Nails
Two or three flat sections divided by clean lines. Tape defines the boundaries, so no freehand accuracy is needed.
The colours must be fully dry before the next section is taped, or the tape pulls the first one up. That waiting period is the reason this design takes longer than it looks, and rushing it is the usual cause of failure.
Styling Tips
• Tape off sections and paint one colour at a time
• Wait for full drying between sections
• Use two or three colours, no more
Why It Works
• Tape supplies the precision
• Bold result from flat colour
• Easy to adapt to any palette
Best Materials / Colors
• Nail striping tape
• Coral and white polish
• Base and top coat

14. Simple Glitter Gradient
Glitter concentrated at the tip, fading toward the centre. The same sponge technique as ombre, with sparkle instead of a second colour.
Building density in passes is what creates the fade. Loading the sponge heavily produces a hard line rather than a gradient. Two or three light presses at the tip, each slightly further down, does it.
Styling Tips
• Press glitter at the tip in two or three light passes
• Move slightly further down with each pass
• Finish with a thick top coat to smooth the texture
Why It Works
• The fade hides an uneven edge
• Works over any neutral base
• Reads as party-ready without nail art
Best Materials / Colors
• Fine glitter polish
• Nude or blush base
• Make-up sponge and top coat

15. Tiny Star Nail Art
Stars are hard to paint and easy to stick. Stickers remove the problem entirely.
They need sealing under a top coat or the edges catch and peel within a day. Placing them slightly off-centre rather than dead centre reads as more considered, and an odd number across the hand looks more deliberate than an even one.
Styling Tips
• Use star stickers rather than painting
• Seal edges under a top coat
• Place them off-centre, in odd numbers
Why It Works
• No drawing skill involved
• Small scale suits short nails
• Celestial motifs sit well on neutrals
Best Materials / Colors
• Gold star stickers
• Nude or pastel base
• Glossy top coat

16. Pastel French Tips
The same technique as a white French, with the colour swapped. Pastels are more forgiving than white, because a wobble in a pale lavender line shows less than the same wobble in stark white.
That makes this the sensible first French attempt. Starting from the outside edge and drawing inward gives a steadier line than starting mid-nail.
Styling Tips
• Draw from the outer edge inward
• Pastels forgive a wobble that white would expose
• Keep the base sheer pink or nude
Why It Works
• Lower contrast hides imprecision
• Familiar shape, updated colour
• Good practice before attempting white
Best Materials / Colors
• Lavender or baby blue polish
• Sheer pink base
• Fine liner brush

17. Minimal Line Art Nails
Abstract lines have no correct version, which removes the pressure that a geometric pattern creates. A wobble becomes part of the design rather than a mistake.
Line weight matters more than line shape. A consistent thin line reads deliberate and modern; a line that thickens and thins reads hand-drawn. Either works, provided it is consistent across the hand. A liner brush with fewer bristles holds less polish and gives finer control than a full brush.
Styling Tips
• Use a thin liner brush, loaded lightly
• Keep line weight consistent across all nails
• Work over a neutral base
Why It Works
• No correct version to fail against
• High impact from very little polish
• Suits short nails well
Best Materials / Colors
• Black or espresso liner polish
• Nude or sheer base
• Precision liner brush

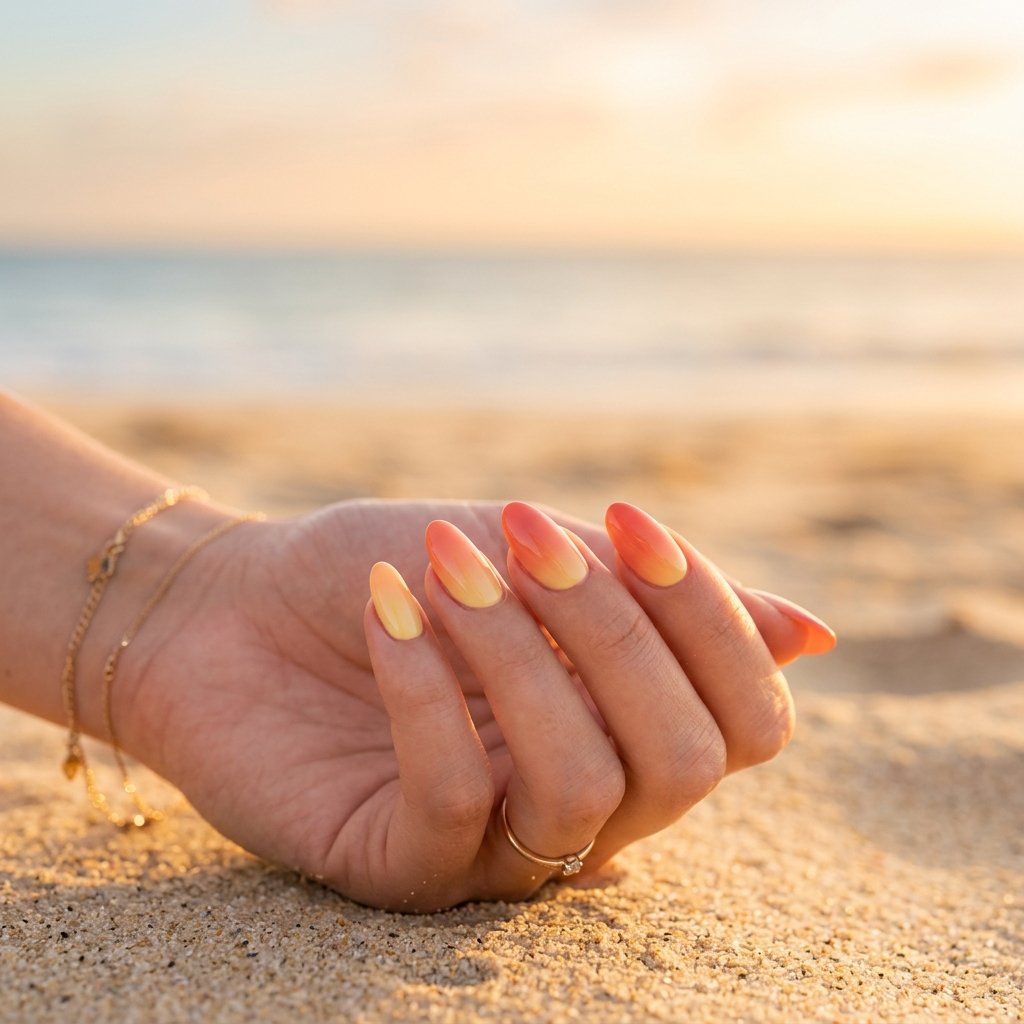
18. Soft Peach Summer Nails
Single-colour manicures live or die on application rather than design. Peach is a forgiving shade to learn on, since its warmth flatters most skin tones and it hides a slightly uneven edge better than a cool tone.
Three thin coats beat two thick ones every time. Each coat should look patchy on its own — that is what thin means. Capping the free edge, running the brush along the very tip of the nail, adds days to how long the colour lasts.
Styling Tips
• Apply three thin coats, each looking patchy alone
• Cap the free edge by brushing along the tip
• Leave a hairline gap at the cuticle
Why It Works
• Warm tone flatters most skin
• No tools beyond the bottle brush
• Brightens hands in summer light
Best Materials / Colors
• Peach polish
• Base coat
• Glossy top coat

19. Simple Checkerboard Nails
Checkerboard looks like the hardest design here and is mostly a taping exercise. Thin tape laid in a grid turns freehand squares into a fill-in job.
Only alternate squares get painted, which halves the work. Tonal versions — matte and gloss of the same colour, or two close pastels — read softer than black and white and hide a misaligned grid far better.
Styling Tips
• Lay tape in a grid and fill alternate squares
• Try a tonal pair instead of black and white
• Keep it to one accent nail to start
Why It Works
• Tape converts drawing into filling
• Only half the squares need paint
• Strong graphic impact
Best Materials / Colors
• Black and white polish
• Thin nail tape
• Top coat to level the surface

20. Soft Lavender Nails
Pastel purples carry less pigment than deeper shades, which means they streak on the first coat more than almost any other colour.
The fix is patience rather than product. Two thin coats even out where one thick coat makes streaking worse, because the thick layer traps solvent underneath and never fully levels. Lavender also shifts cooler under warm indoor lighting than it appears in daylight.
Styling Tips
• Expect the first coat to streak — the second evens it
• Never fix streaking with a thicker coat
• Check the shade under both daylight and lamplight
Why It Works
• Colour without commitment to brightness
• Suits most skin tones
• Single-colour simplicity
Best Materials / Colors
• Lavender polish
• Base coat
• Glossy top coat

21. Minimal Triangle Nail Art
Two pieces of tape meeting at an angle produce a triangle. No freehand work is involved at all.
Placement near the cuticle wears better than placement at the tip, because the free edge takes every knock. A triangle at the base also survives a few days of growth, while one at the tip starts looking wrong as soon as the nail moves.
Styling Tips
• Form the shape with two pieces of tape at an angle
• Place triangles near the cuticle, not the tip
• Keep to one or two nails
Why It Works
• Geometry from tape, not skill
• Cuticle placement outlasts tip placement
• Reads as architectural and modern
Best Materials
• Nude base polish
• Black or gold liner polish
• Nail tape

22. Gold Stripe Accent Nails
One line, one nail. This is the smallest possible piece of nail art and among the most effective.
Metallic polish is thinner than cream polish and flows more readily, which makes it easier to draw a clean line with. It also dries faster, so the brush needs reloading more often than expected. A single vertical stripe down the centre lengthens the nail visually.
Styling Tips
• Draw one vertical stripe down the centre
• Reload the brush often — metallics dry fast
• Pair with a soft nude base
Why It Works
• Metallic polish flows easily for lines
• A single stripe lengthens the nail
• Minimal effort, high finish
Best Materials
• Gold striping tape or gold liner polish
• Nude base polish
• Gloss top coat

23. Soft Mint Green Nails
Mint is a cool pastel, and cool pastels expose yellow undertones in the natural nail more than warm ones do.
A base coat solves this, and it also prevents the staining that green pigments are prone to leaving behind. Skipping the base coat with any green or blue polish is how nails end up tinted after removal.
Styling Tips
• Always use a base coat — greens stain
• Two thin coats for even opacity
• Suits short square nails
Why It Works
• Fresh colour without brightness
• Single-shade simplicity
• Flatters warm-weather skin
Best Materials
• Mint green polish
• Base coat — essential here
• Gloss top coat

24. Simple Animal Print Accent
Leopard print is irregular blobs with broken outlines. Precision would actually ruin it.
The method is three steps: irregular brown patches, then partial black arcs around some of them, leaving gaps. Complete outlines read as spots rather than leopard. Keeping it to one nail stops the whole hand becoming busy.
Styling Tips
• Place irregular brown patches first
• Add partial black arcs, never full outlines
• Restrict it to one accent nail
Why It Works
• Irregularity is the point
• Broken outlines are easier than complete ones
• Muted tones keep it wearable
Best Materials
• Brown polish for patches
• Black liner polish for arcs
• Nude or beige base

25. Elegant Pearl Nails
Flat-back pearls sit proud of the nail, so they catch on clothing and hair. That is the trade for the texture they add.
Setting them into a wet top coat holds far better than gluing onto a dry surface. Half-pearls stay attached longer than full spheres, and placement near the cuticle keeps them clear of the knocks that dislodge tip-mounted ones.
Styling Tips
• Set pearls into a wet top coat, not dry polish
• Choose half-pearls over full spheres
• Place them near the cuticle
Why It Works
• Texture without any painting skill
• One or two pearls carry the whole design
• Sits well with milky and nude bases
Best Materials
• Flat-back nail pearls
• Milky white polish
• Thick top coat to embed and seal

26. Nude Glossy Nails
The simplest design here, and the one where cleanup shows most. With no pattern to distract, polish on the skin is the only thing anyone notices.
A small flat brush dipped in remover, run around the cuticle after the colour dries, is what separates a home manicure from a salon one. It takes about a minute and improves every design on this list.
Styling Tips
• Match the shade to skin undertone, not shade name
• Clean up with a brush dipped in remover
• Two thin coats, then a high-shine top coat
Why It Works
• Nothing distracts from a clean finish
• Suits every setting and outfit
• Chips are close to invisible
Best Materials
• Nude polish matched to skin tone
• Flat cleanup brush and remover
• Gloss top coat

27. Rainbow Tip Nails
A different colour tip on each nail. It combines the French technique with the rainbow idea, and needs no more skill than either.
Thin tips work better than thick ones here, because five different colours in a bold band becomes chaotic. Keeping the line slim holds the set together.
Styling Tips
• Paint a different colour tip on each nail
• Keep the band thin — thick tips look chaotic
• Use a sheer pink base throughout
Why It Works
• Only the tip needs painting
• Colour supplies the interest
• Thin lines keep it cohesive
Best Materials
• Pastel polish set
• Sheer pink base
• Fine liner brush

28. Matte Black Minimal Nails
Black is the least forgiving colour to apply, because every streak, gap, and skin smudge shows at full contrast.
The matte top coat helps considerably, since it removes the reflection that highlights brush marks. Cleanup around the cuticle matters more here than with any other shade — black on skin is visible from across a room.
Styling Tips
• Two thin coats — black shows every streak
• Clean the cuticle line carefully
• Finish with a matte top coat
Why It Works
• Matte hides brush marks gloss reveals
• Single colour, strong impact
• Suits short square shapes
Best Materials
• Black polish
• Matte top coat
• Cleanup brush and remover

29. Tiny Butterfly Nail Art
Butterflies are difficult to paint and simple to apply as decals. For a beginner, the decal version is the only sensible route.
Decals go on over dry colour and need sealing immediately. Translucent wings layered under a top coat produce the floating effect; opaque ones sit flat and read as stickers. One or two per hand is the limit before it turns busy.
Styling Tips
• Use translucent decals for a floating effect
• Seal immediately under a top coat
• One or two per hand, no more
Why It Works
• Decals remove the painting entirely
• Translucency adds depth
• Suits pastel and sheer bases
Best Materials
• Butterfly nail decals
• Pastel or sheer base polish
• Glossy top coat

30. Soft Beige Minimal Nails
Beige asks nothing of the wearer beyond a clean application, which makes it the design to practise fundamentals on.
Everything that improves a beige manicure improves every other design here: a base coat, thin coats, a capped free edge, a hairline gap at the cuticle, and a minute of cleanup at the end. Getting those five right matters more than any pattern.
Styling Tips
• Choose a warm beige for most skin tones
• Apply the five fundamentals — base, thin coats, capped edge, cuticle gap, cleanup
• Finish with a gloss top coat
Why It Works
• Ideal for practising technique
• Neutral enough for any setting
• Grows out almost invisibly
Best Materials
• Warm beige polish
• Base coat
• Gloss top coat

Conclusion
Five habits improve every design above, and none of them involve artistic skill. Use a base coat. Apply thin coats rather than thick ones, since solvent evaporates from the surface down and a thick layer stays soft underneath. Cap the free edge. Leave a hairline gap at the cuticle instead of flooding it. Clean up afterwards with a brush dipped in remover.
These simple nail art ideas perfect for beginners then divide by tool. Dots need a dotting tool or a toothpick. Straight lines and geometric shapes need tape. Stars and butterflies need stickers. Ombre and glitter gradients need a make-up sponge. Everything else needs only the brush in the bottle. A comparison of which finishes need gel and which work in ordinary polish appears in this guide to 2026 nail trends.
Starting with a plain colour and adding one element is more productive than attempting a full design first. Technique carries over between designs. A specific pattern does not. Anyone ready to move on to longer-wearing finishes will find the setup covered in this guide to at-home gel nails.

Leave a Reply