
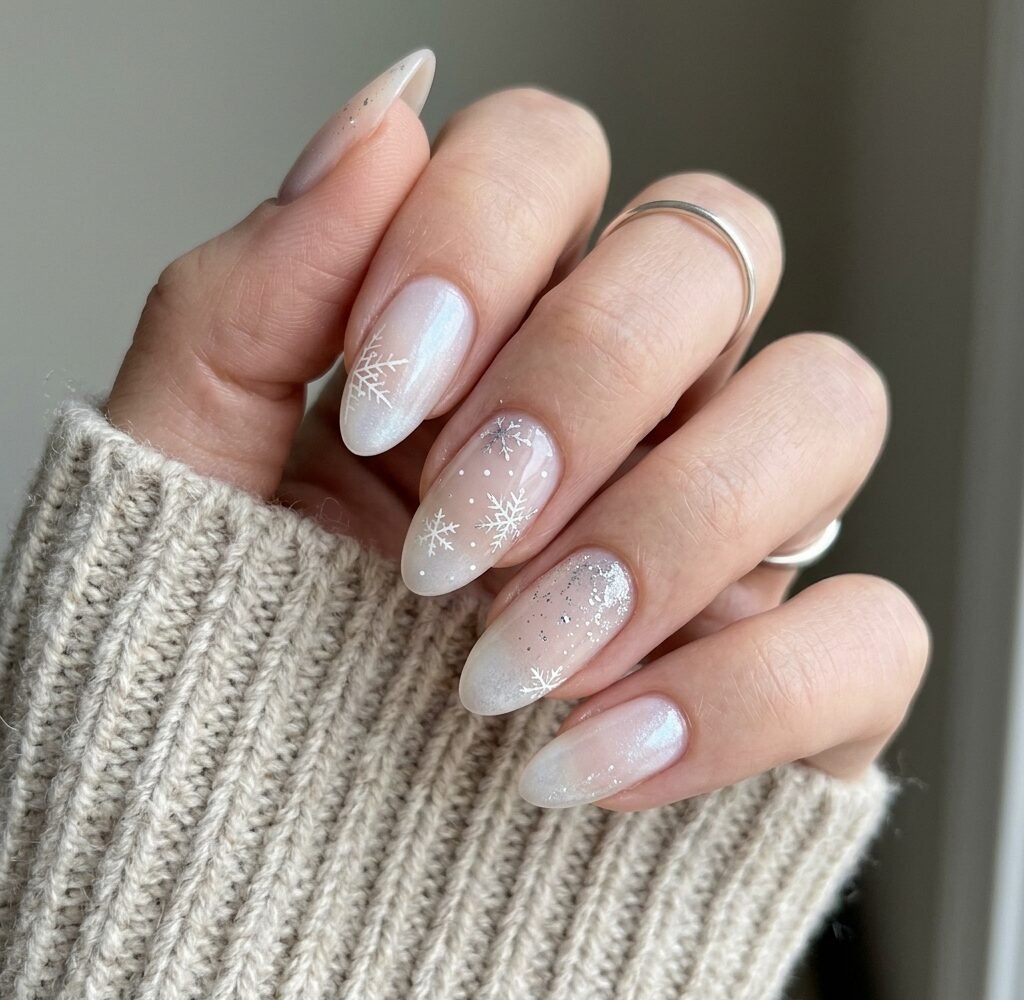
A real snowflake is one of the most refined shapes in nature. It has six arms, crisp angles and a pattern fine enough that people photograph it under magnification. Put one on a fingernail, though, and it often ends up looking like a classroom window decoration. The motif is the same. What changes is the size, the thickness of the line and the number of flakes crowded onto one hand.
This guide treats snowflake nails as a question of proportion rather than imagery. It begins with what tips the design toward cutesy, then moves through nine styles that stay light and grown-up. After that come color pairings, placement, a simple home method and a few quick answers.
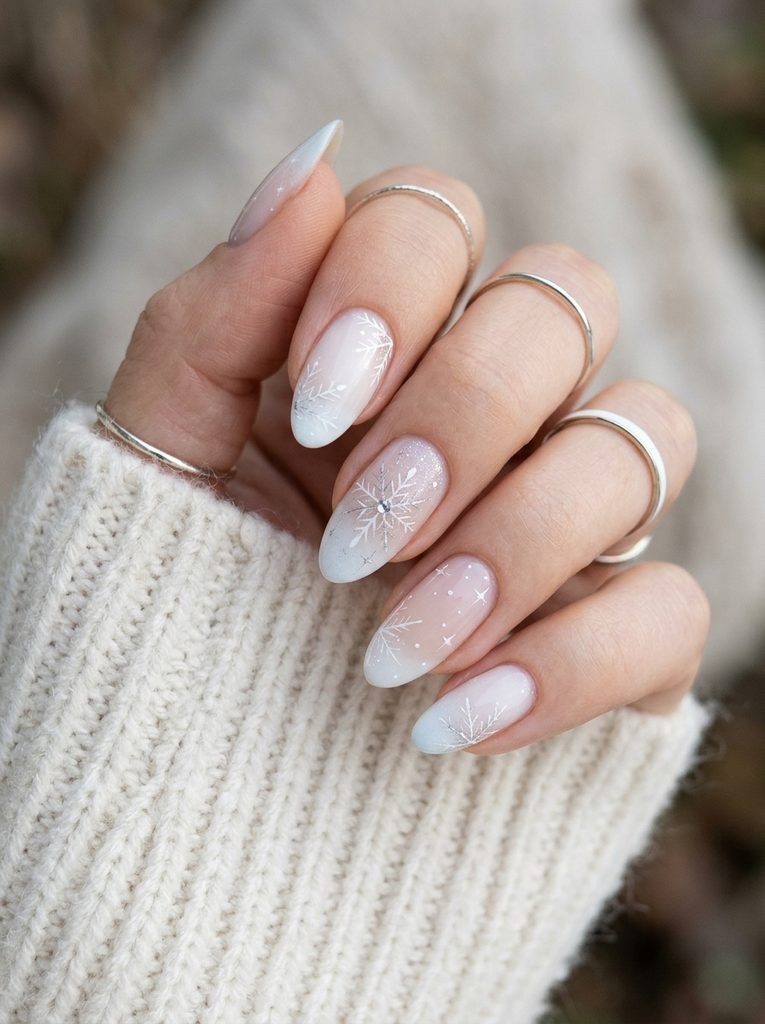
What Makes a Snowflake Look Childish on a Nail
The motif is rarely the problem. A handful of small decisions stack up, and four of them matter most: size, line weight, color contrast and repetition.
Size comes first. A flake that fills the whole nail plate becomes the only thing the eye can see, which is how a manicure ends up resembling a sticker. A small flake leaves room for the base color to carry the nail.
Line weight is next. A standard polish brush leaves thick strokes with rounded, blunt ends, and chunky arms look like cut paper. Thin, tapering lines look more like frost on glass.
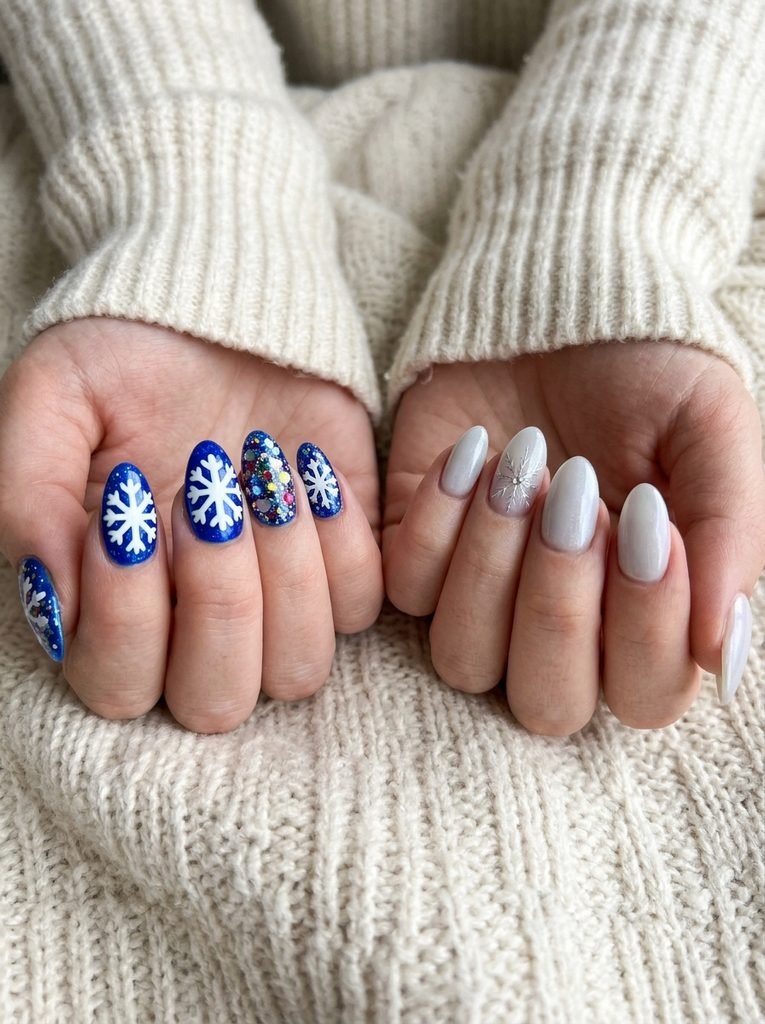
Color contrast does a lot of quiet work too. Bright white on saturated royal blue is the pairing most people associate with children’s winter artwork. Softer pairings, such as pearl on pale gray, give the same idea a much calmer tone.
Repetition is the last factor. Ten nails carrying ten identical flakes read like a wrapping paper pattern. Varying or removing some of them looks intentional.
| Design choice | Tends to look childish | Tends to look delicate |
|---|---|---|
| Size | Fills most of the nail | Smaller than half the nail |
| Line weight | Thick, rounded strokes | Fine, tapering lines |
| Color pairing | Bright white on bold blue | Pearl or silver on a pale base |
| Count | A flake on every nail | One to three nails |
| Extras | Glitter, gems and outlines together | One finish or accent only |
| Placement | Dead center | Off-center, at the cuticle or cropped at the tip |
None of this is a rule. A bold, chunky flake can look playful in a way some people enjoy. The table just explains why two snowflake manicures can feel so different.
Borrowing From the Real Crystal
Real snow crystals offer a useful design cue. Snowflakes have six sides because ice forms a lattice of hexagonal rings, which gives them six-fold symmetry. In practice, that means six arms radiating from one center point. A flake with five or eight points looks more like a star or an asterisk, so six is the detail that makes the shape believable.
The easiest way to draw one is to start with three lines crossing at the middle, like a wheel with six spokes. Then add small angled branches along each arm. According to the University at Buffalo, limbs sprout from the hexagonal base with spiky offshoots on each branch, and fast-growing crystals tend to end up with jagged, erratic edges. A hand-drawn flake with slightly uneven branches is therefore not a flaw. A little irregularity can look more natural than a perfectly mirrored stencil.
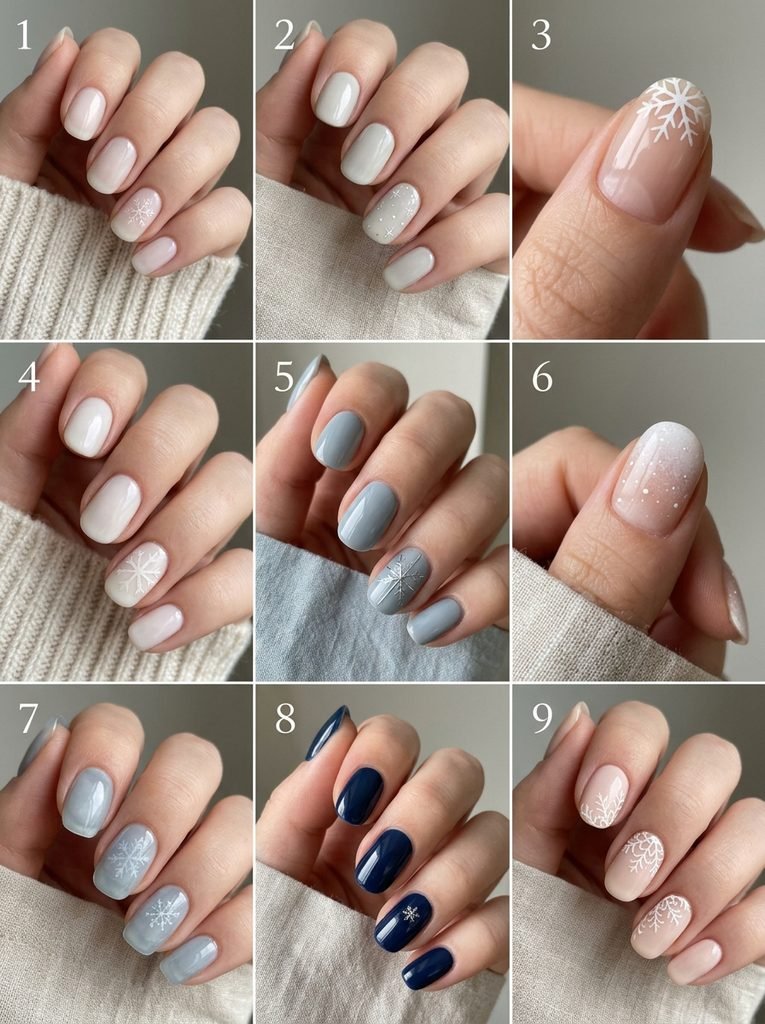
Nine Snowflake Nail Designs That Stay Delicate
Each idea below relies on restraint, whether in scale, color or placement. They can be mixed across one hand, though keeping to two or three styles at once usually looks cleaner.
1. One Hairline Flake on a Sheer Milk Base
Start with a sheer, milky white or soft ballet pink on all ten nails. On the ring finger or thumb, draw a single flake in thin pearl white or silver. Keep it no wider than half the nail.
The other nails stay plain, so the flake works like a small piece of jewelry rather than a theme. This is also the most forgiving option for anyone new to fine linework.
2. Tiny Flurries Scattered Across the Nail
Instead of one defined flake, scatter a handful of micro marks: dots in two sizes, small crosses, and a few three-line asterisks about the size of a grain of rice. Work over a pale icy gray or greige base.
Uneven spacing is what sells it. Cluster the marks toward one corner and leave the rest empty, the way snow looks when it drifts rather than falls in a grid. A dotting tool or the tip of a toothpick handles all of it.
3. A Flake Cropped by the Tip
Draw a slightly larger flake so that part of it runs off the free edge of the nail. The cropped shape feels like a photograph taken mid-fall rather than a stamped icon.
This works well over a clear or bare nail with a glossy top coat. Because the flake is only partly visible, the exact branch details matter less, which makes it easier than it looks.
4. White on White, Glossy and Matte
Paint a milky white base and seal it with a glossy top coat. Then draw the flake with a matte top coat, or in a white with a different finish, so it shows only when light hits it at an angle.
The result is quiet enough for nearly any setting. Up close it has real texture, and from a distance it looks like a plain, clean manicure.
5. Silver Linework on Ice Blue
Choose a muted, grayed ice blue rather than a bright baby blue. Then draw a fine flake in silver or a chrome liner polish.
The gray undertone keeps the blue from looking toylike, and the metallic line catches light without needing glitter. Keep the arms straight and the branches short for a crisp, graphic look.
6. The Snowfall Fade
Dab white polish with a makeup sponge near the tip, then ease it upward in two or three light passes until it turns almost sheer. Finish with three or four tiny dots floating higher up the nail.
It looks like soft snowfall rather than a flake motif, which suits anyone who likes the winter feeling without a literal shape. The key is dabbing lightly, since heavy pressure leaves a hard white band.
7. Glass Jelly With a Suspended Flake
Apply a translucent jelly polish in pale blue-gray or smoky lilac. Paint the flake on top, or set a thin decal onto the color, then cover everything with a smooth, slightly thick top coat.
The layering gives the flake some depth, as if it sits inside ice rather than on it. Jelly finishes also let a little natural nail show through, which adds to the softness.
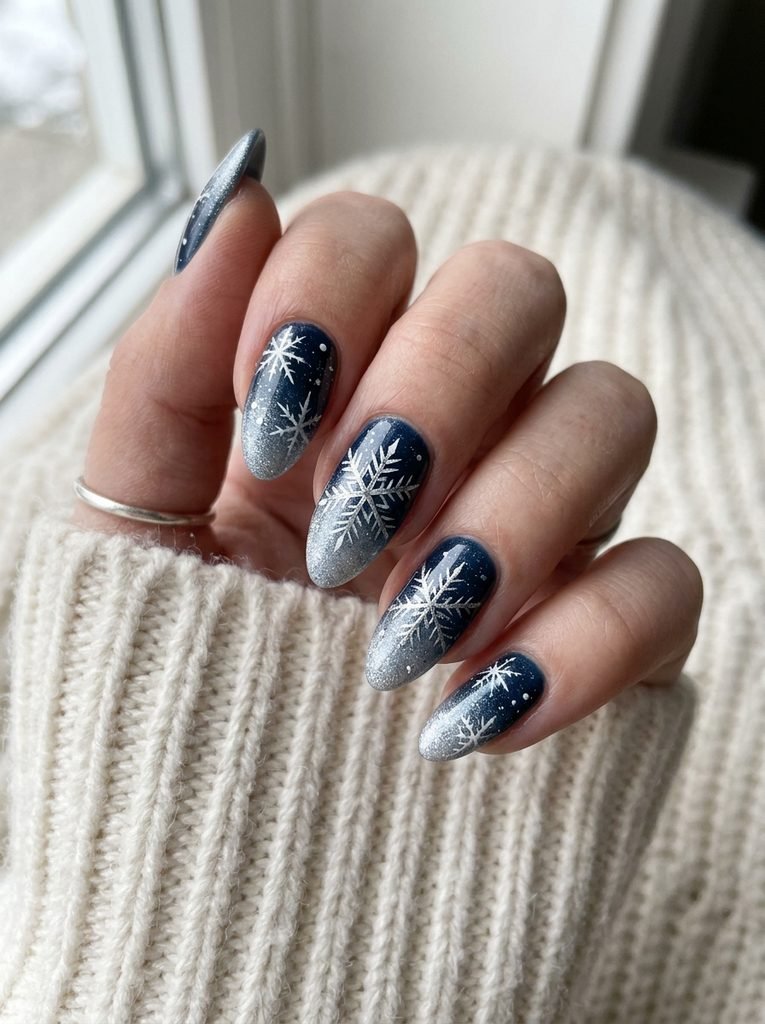
8. Night Sky: Deep Navy or Black Cherry With Fine Silver
For an evening version, use a dark, glossy base and draw very small silver flakes on two nails. Dark colors make thin lines look sharper, so the scale can stay tiny.
The risk with dark bases is overdoing the sparkle. One metallic color and no extra glitter keeps the look polished rather than themed.
9. Lace Flake at the Cuticle
Paint half of a flake rising from the cuticle line, with thin, curved branches that fan out like crochet lace. Use a pale base in cream, soft gray or blush, and a single fine line color.
Because it sits at the base of the nail, it grows out gracefully and stays clear of the knocks that wear away designs at the tip. It also pairs well with a plain tip, so the nail looks balanced rather than busy.
Choosing Colors That Keep the Flake Soft
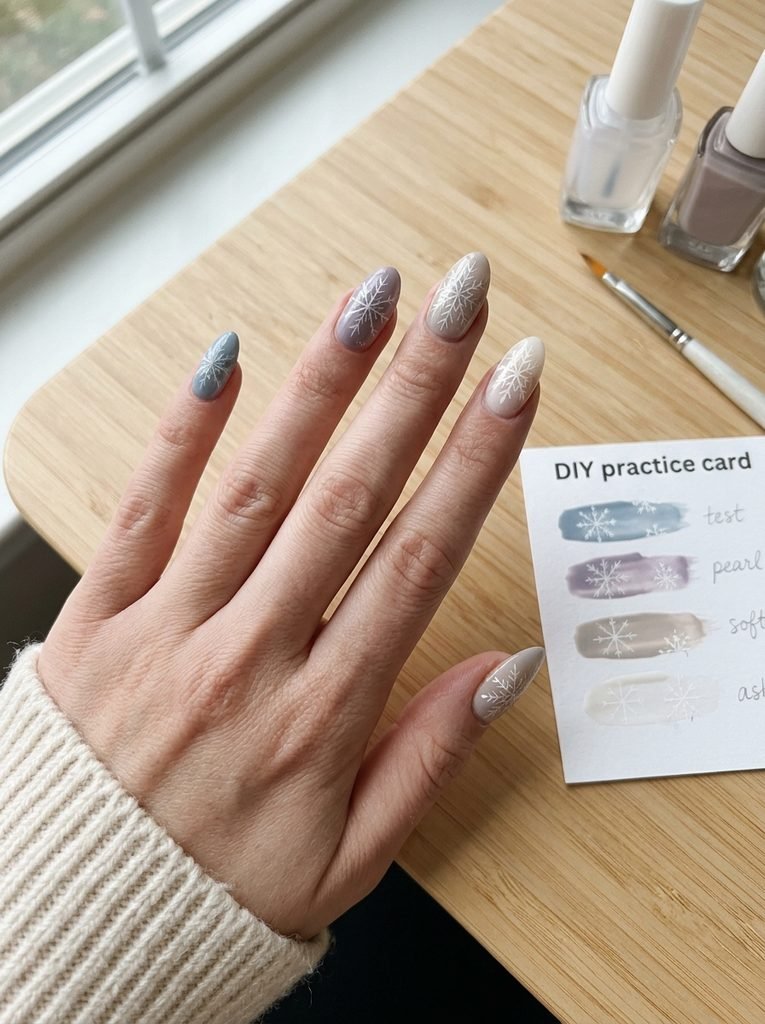
Color decides the mood almost as much as scale does. For the flake itself, pearl white and milky off-white feel gentler than a stark, bright white. Silver adds sparkle without glitter, and pale champagne suits cream or blush bases if icy tones feel too cold.
For the base, sheer milky shades, ash blue, smoky lilac, soft gray and greige all let the line work breathe. They share a low-saturation quality that keeps attention on the detail instead of competing with it.
One pairing to approach carefully is a saturated blue base with bright white lines. It tends to push the design toward the children’s craft look described earlier. If a stronger blue appeals, swapping the white for silver or pearl softens the contrast.
A quick test helps before committing. Paint the base on a practice card, draw one flake in the line color and look at it from arm’s length in daylight. Colors that look elegant up close can read very differently from a distance.
How Many Nails, and Where on the Nail
Count and placement shape the final impression more than most people expect. One to three nails with snowflakes is usually enough, and odd numbers tend to look more deliberate than even ones. The ring finger and thumb are common choices because they sit naturally apart from each other.
On the nail itself, off-center almost always beats dead center. Near the cuticle, a flake feels like a tiny detail. At the tip, a cropped one feels like a snapshot. Dead center tends to read as a logo.
Length matters too. Short nails offer less space, which actually helps, because small is the goal. A single tiny flake near the cuticle or a cluster of micro dots fits neatly. Longer nails can carry a slim flake drawn along the length of the nail, which stretches the line visually and keeps the arms narrow.
Shape changes how a flake sits. An almond tapers toward the tip, so a narrower design follows that line better, while a square or squoval nail gives a flatter surface for a wider flake. For a closer look at how each shape sits on different fingers, the nail shapes comparison is a useful companion.
Doing Snowflake Nails at Home
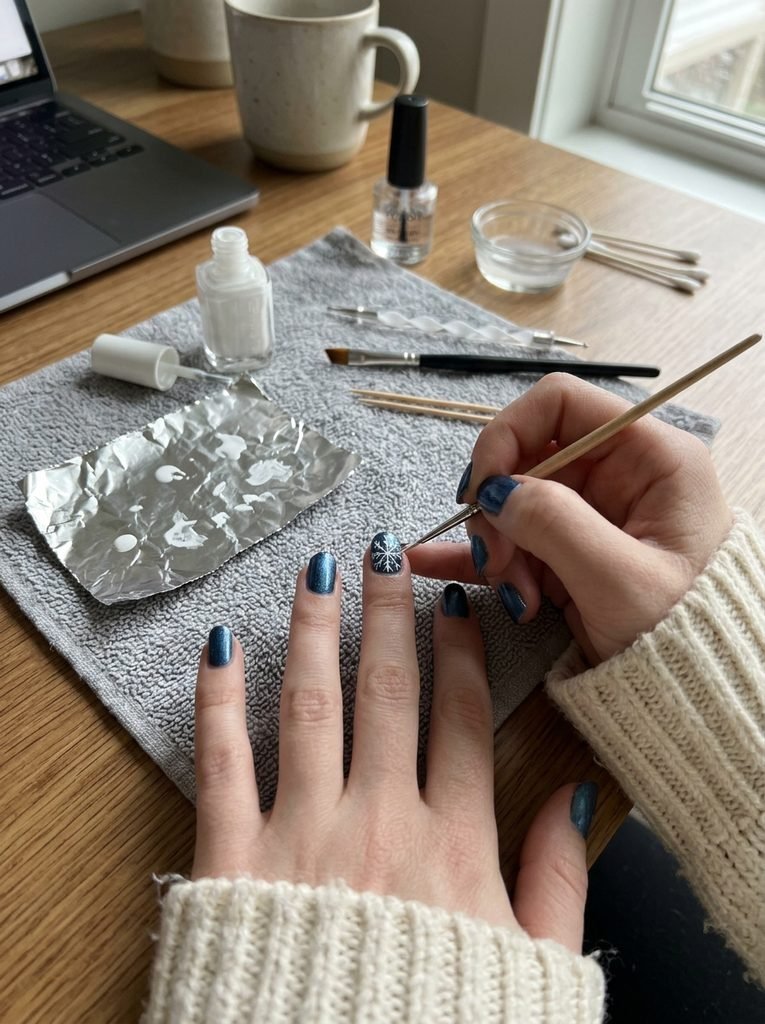
Fine lines are less about artistic talent than about the right tools and a light hand. A thin nail art liner brush is the most useful item, along with a dotting tool or toothpick and a small palette, such as a piece of foil or a plastic lid, to hold a tiny amount of polish.
A simple method for a basic flake:
- Let the base color dry completely, since a damp base drags and smears.
- Load the liner brush lightly and wipe off the excess on the palette’s edge.
- Draw one line through the center, then two more crossing it, forming six arms.
- Add short angled branches to each arm, then a small dot at the center or arm tips.
- Seal with a thin top coat, floating the brush over the surface instead of pressing.
Practicing on a piece of card or a spare nail tip first saves frustration. A tiny brush dipped in remover cleans up wobbly lines without disturbing the base.
Anyone who prefers a longer-lasting finish may like the at-home gel manicure guide, which covers setup and curing. Stamping plates and thin decals are also good options if freehand feels like too much.
When it is time to remove the design, Mayo Clinic’s nail care guidance advises limiting nail polish remover and choosing an acetone-free formula. You can read the full advice on the Mayo Clinic nail care page.
Matching Snowflake Nails to Where You’ll Be
For everyday and office wear, the single hairline flake or the tiny flurries are the safest choices. They look like a considered manicure up close and plain at a distance, which suits meetings and long workdays.
For dinners and parties, the night sky style or the glass jelly version has more presence. Both catch light well in evening settings without needing glitter.
Holiday gatherings call for a slightly different approach. If you plan to pair snowflake details with red, green or gold, the Christmas nail ideas guide covers how to keep festive colors from feeling costume-like.
Snowflakes also outlast December. Because the motif belongs to winter rather than Christmas, an icy, pale version can work well through February, especially without red or green. For color pairings with wool and heavy knits, the winter nail colors guide shows which shades sit well beside coats and sweaters.
Quick Answers About Snowflake Nails
How many snowflakes are enough?
One to three nails with a flake usually looks balanced, with the rest left plain or in a matching base color.
Can snowflake designs work on short nails?
Yes. Micro flakes, scattered dots and a flake near the cuticle all suit shorter lengths, since small details are the point.
Do snowflake nails only suit December?
No. In pale, icy shades without red and green, they can carry through the rest of winter.
What if freehand drawing feels too hard?
Thin decals, stamping plates or a simple dotted flurry give a similar effect with far less precision.
One Last Check Before You Commit
A useful final test is the squint. Hold your hand at arm’s length and look at it for a second or two. If the flake still reads as a bold, defined shape from that distance, it may be larger or brighter than a delicate look needs. If it fades into a soft sparkle and then reveals itself up close, the proportions are probably right.

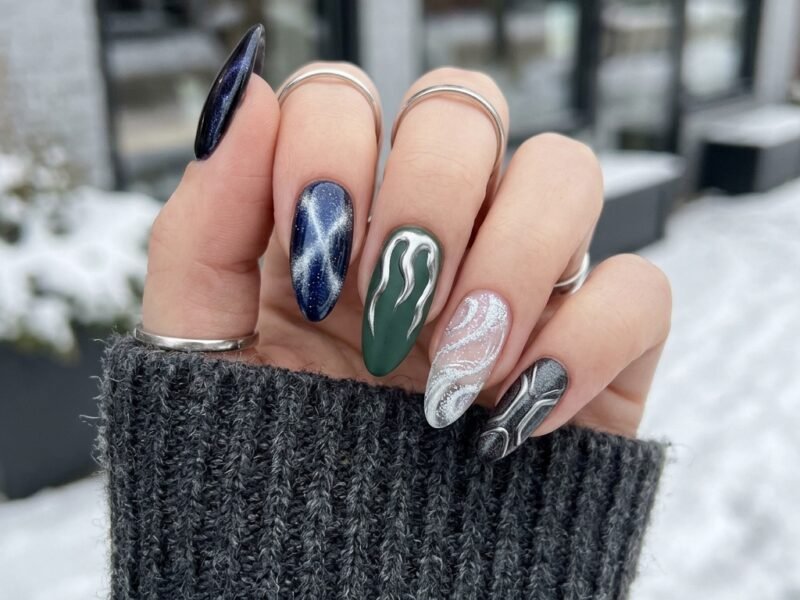
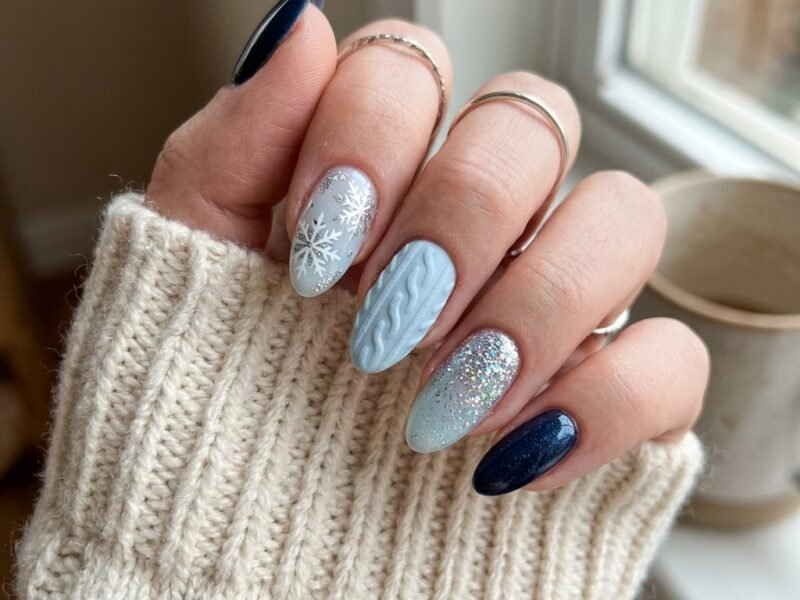
[…] Paint every nail in a pale gray-blue cream. On two nails, use a fine liner brush and white polish to draw a few hairline cracks radiating from one point near the tip. Let them branch at slightly odd angles, the way ice splits across a frozen puddle. Trace a few lines again in silver so they catch light differently. Real cracks wander, so a tidy star looks stenciled. Anyone who wants literal flakes will find those in the snowflake nail ideas guide. […]
[…] These shades suit the days when the sky is white and the air is sharp. Frosted pearl looks luminous on short nails, and icy blue gives a cool counterpoint to heavy knitwear. They also sit comfortably with a minimalist motif: a single small snowflake on one nail, for example, as shown in these snowflake nail ideas that stay delicate. […]