At-Home Gel Nails: Salon Results at Half the Cost
Let us be honest about what a regular gel manicure actually costs. There is the appointment itself, typically between thirty and sixty dollars depending on where you live and whether you want any nail art. There is the tip. There is the time, which includes driving there, waiting, sitting through the appointment, and driving home. Do that every two to three weeks and you are looking at somewhere between seven hundred and fifteen hundred dollars a year, plus a genuinely significant chunk of time.
For a lot of women, that math eventually becomes unsustainable. The gel manicure stays in the budget until it does not, and then it quietly becomes the thing that gets cut when money gets tighter or time gets shorter.
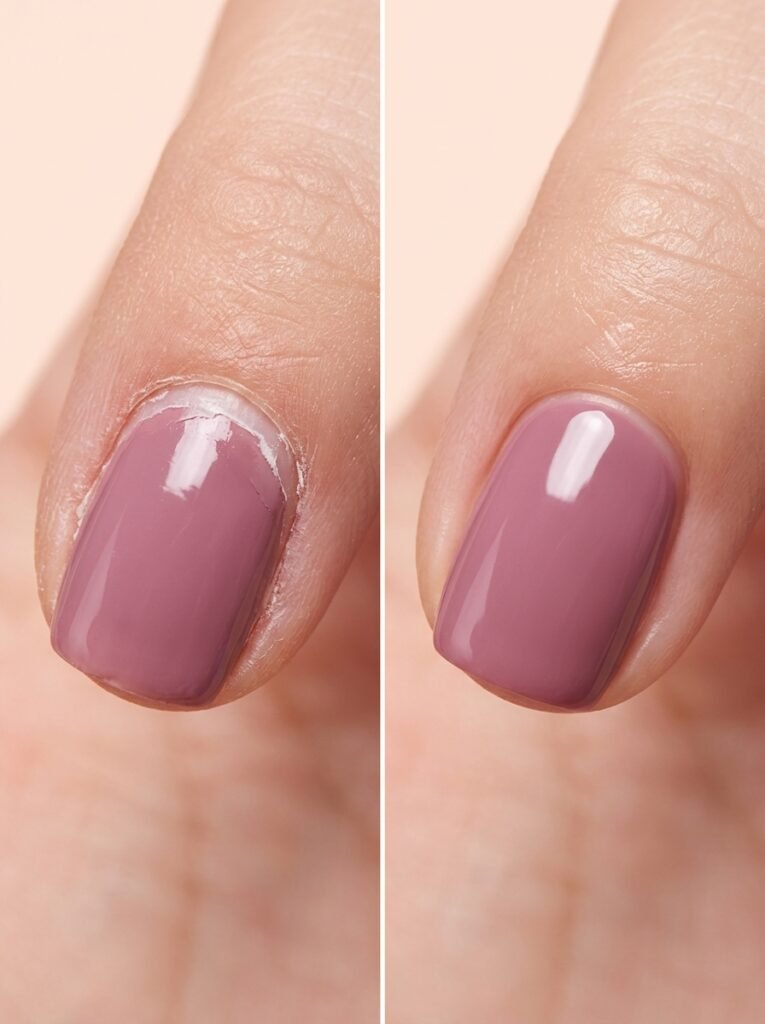
Here is what the nail industry does not lead with: the results you get at a salon are absolutely achievable at home. Not almost as good. Not a close second. Actually comparable, once you understand what makes the difference between gel that chips and peels within a week and gel that stays glossy and intact for two weeks or longer.
The gap between salon gel and at-home gel used to be about the products and the lamps. That gap has closed significantly. Professional-quality gel systems are available for consumer purchase, the LED lamps that cure them are widely accessible at reasonable prices, and the technique, while it takes a few sessions to develop, is entirely learnable. This guide covers everything you need to know to make at-home gel nails actually work.

What Makes Gel Nails Different From Regular Polish
Before getting into the how, the what matters. Understanding why gel behaves differently from regular nail polish helps you understand why each step in the application process exists and why skipping steps causes the specific problems it causes.
Regular nail polish dries through solvent evaporation. The liquid in the bottle releases into the air as the polish sits, leaving behind the colour pigment in a dried film. This process takes time, is sensitive to heat and humidity, and produces a relatively soft film that dents, chips, and wears at the edges relatively quickly.
Gel polish is different in its fundamental chemistry. It does not dry through evaporation. It cures through a photochemical reaction triggered by specific wavelengths of UV or LED light. When the light hits the gel, it initiates a process called polymerisation, where the individual molecules in the gel cross-link into a hard, durable network. This is why gel polish needs a lamp to cure and why it stays wet and workable until it goes under the light, no matter how long you leave it in the air.
The result of that cured network is a film that is significantly harder and more flexible than regular polish, which is why gel lasts weeks rather than days. It is also why gel does not respond to regular nail polish remover and requires acetone to break down the polymer network for removal.
Understanding this makes the preparation steps make intuitive sense. If the gel is going to cure into a hard, bonded film, the surface it bonds to needs to be clean, dry, properly dehydrated, and lightly abraded so the gel has something to grip. Skipping any of those preparation steps does not just reduce durability slightly. It fundamentally changes what the gel has to adhere to, which is why preparation shortcuts almost always lead to lifting and peeling.
What You Actually Need to Get Started
The startup cost is the biggest commitment in at-home gel, but it is a one-time investment that pays for itself within two or three applications. Here is what the kit actually needs to include and why each item matters.
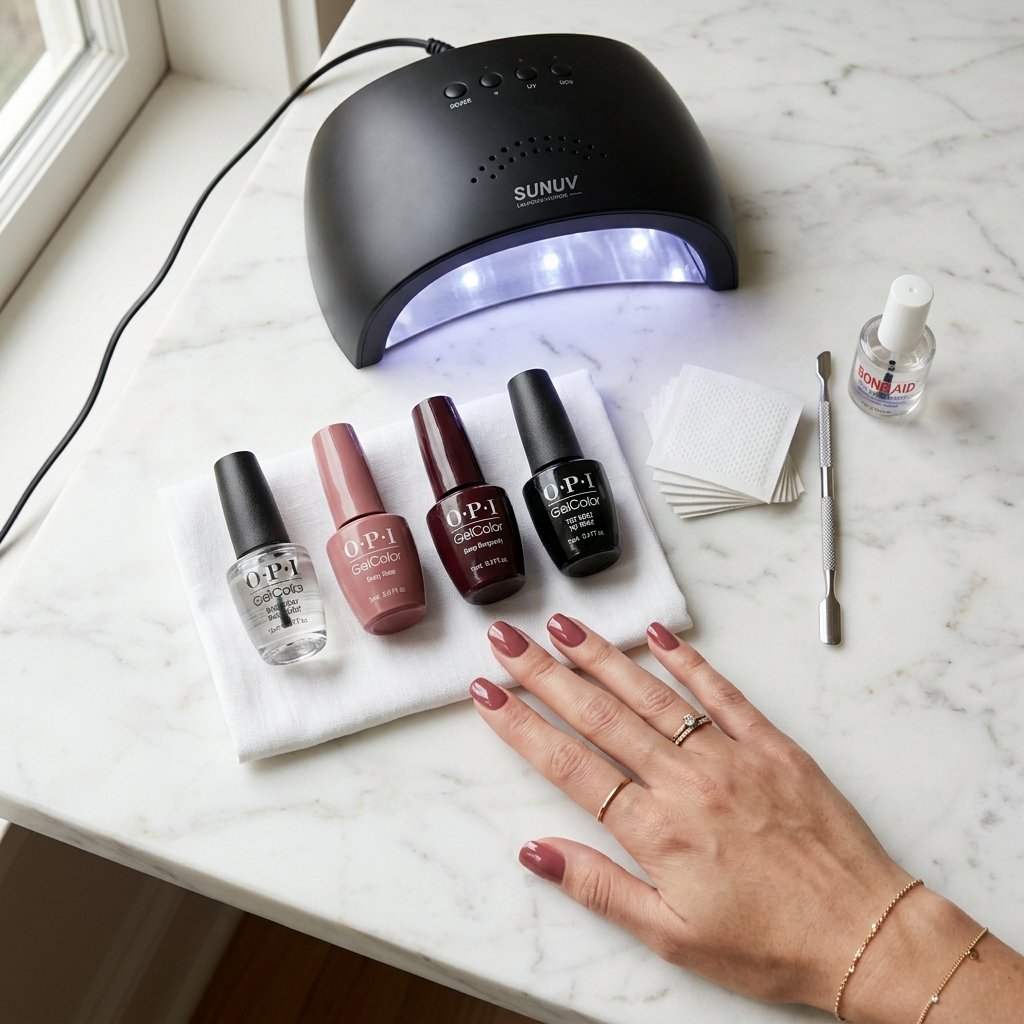
An LED lamp is the foundation of the system. UV lamps work but take longer to cure, are bulkier, and the bulbs degrade over time in a way that LED bulbs do not. A decent LED lamp with at least thirty-six watts of power is the standard recommendation for full curing. There are budget options starting around twenty dollars that work for many gel systems, and professional-grade options in the sixty to one hundred dollar range that cure faster and more evenly. If you are going to invest in one item, this is the one to spend appropriately on.
A quality gel system rather than individual components is the smarter starting point. A system means a base coat, colour gels, and a top coat from the same manufacturer, formulated to work together. Mixing brands across base, colour, and top coat is a common beginner mistake that leads to incompatibility issues: lifting, crinkling, or poor adhesion that gets blamed on technique rather than the real culprit, which is product mismatch.
OPI Gel Color, Gelish, CND Shellac, Kiara Sky, and ORLY Gel FX are all professional-grade systems that are available for consumer purchase and have strong reputations for durability and colour accuracy.
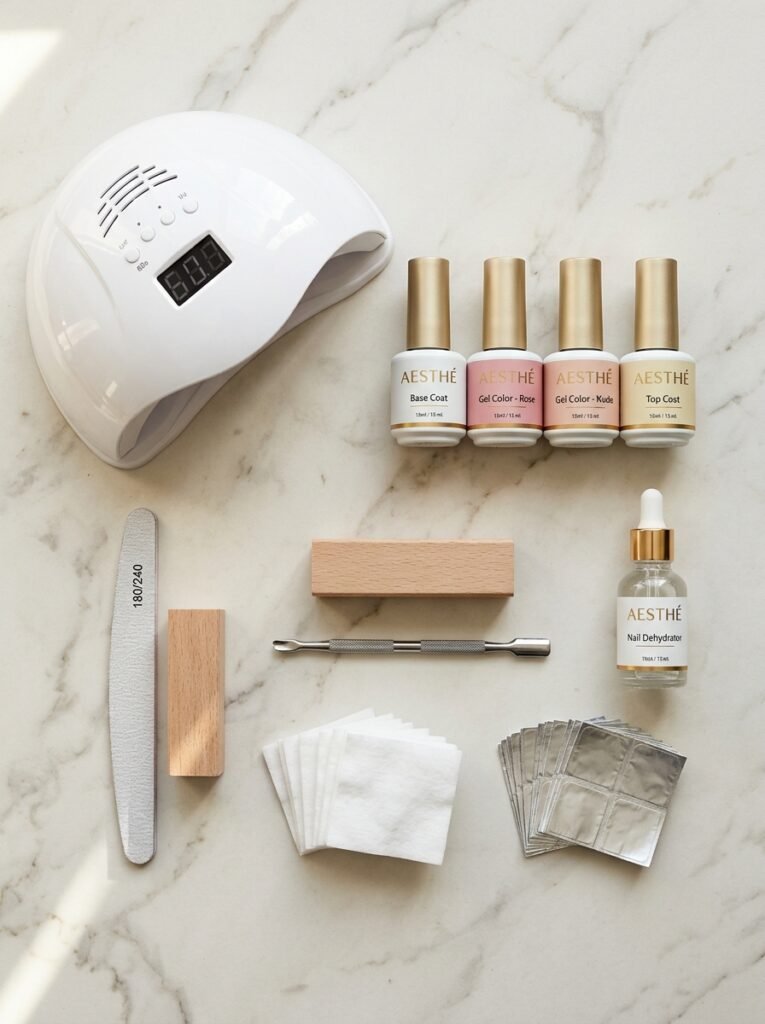
Beyond the gel system and lamp, the additional items needed are: a nail file and buffer, a cuticle pusher, nail dehydrator or isopropyl alcohol, a pH bond primer (optional but helpful for those prone to lifting), lint-free nail wipes, and acetone for removal. Most of these are inexpensive and last through many applications.
Nail Preparation: The Step That Determines Everything
If you take one thing from this guide, make it this: the preparation is not a preliminary step before the real work begins. The preparation is the work. How your gel manicure performs for the next two to three weeks is decided almost entirely before you open a single bottle of gel.
Start with clean, dry nails. Wash your hands and make sure there is no existing polish, lotion, or oil on the nail surface. Even residual hand cream from earlier in the day can compromise adhesion in ways that will not be apparent until day five when one nail starts to lift.
Push back and gently clean the cuticles. Gel applied on or over cuticle skin rather than exclusively on the nail plate will lift from that edge, and once lifting starts anywhere it tends to spread. You do not need to cut cuticles, just push them back and clean up any overhang onto the nail plate itself.
Shape your nails with a file. Whatever shape you prefer, create it now. Filing after gel is applied risks cracking the cured gel at the edge, so the shape is set during preparation.
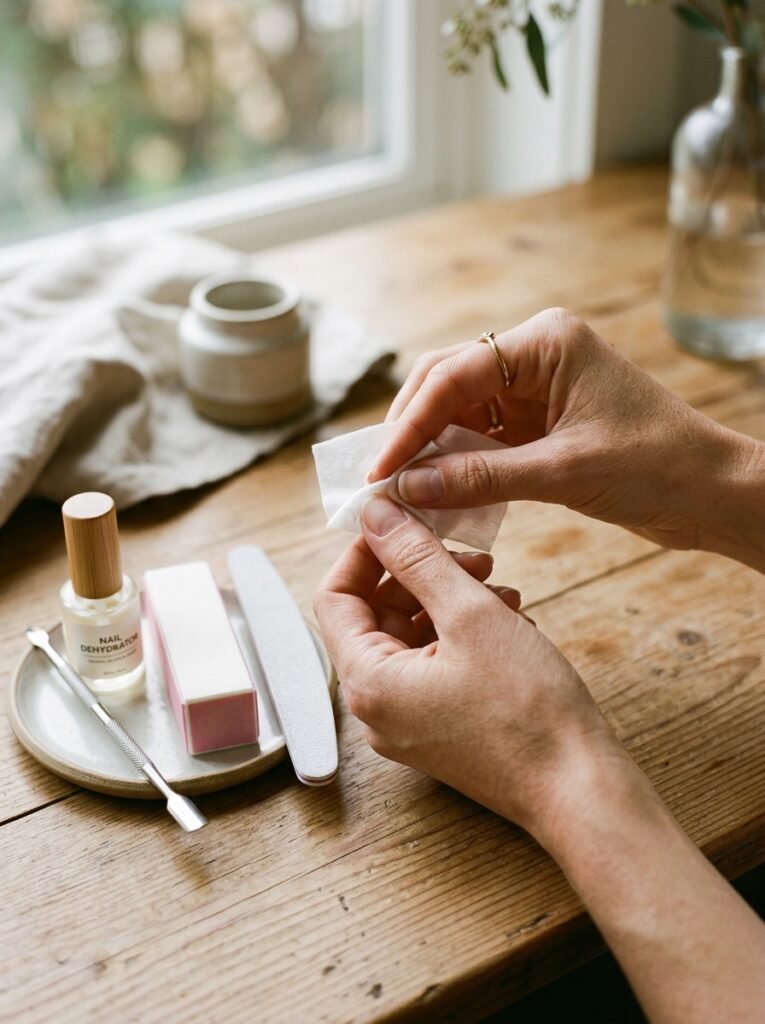
Lightly buff the shine off the nail surface. This is the step people are most tempted to skip because it feels counterintuitive to scratch up the nail. But that light abrasion creates the microscopic texture that gives the base coat something to grab. A gentle pass with a soft nail buffer or a fine-grit file is all that is needed.
Apply nail dehydrator or pure isopropyl alcohol to a lint-free wipe and clean the nail surface, removing any remaining dust, oil, or moisture. Let it dry completely before proceeding. This step is the single most important thing you can do to prevent lifting and it costs almost nothing.
If you have naturally oily nail beds or have historically struggled with gel lifting, a thin layer of pH bond primer applied after dehydration and cured briefly under the lamp can make a significant additional difference. It is not universally necessary but it is a reliable solution when dehydration alone is not enough.
The Application Process Step by Step
With preparation done properly, application is the more enjoyable part. The general rhythm is: apply thin layer, cure under lamp, repeat as needed for each product in sequence.
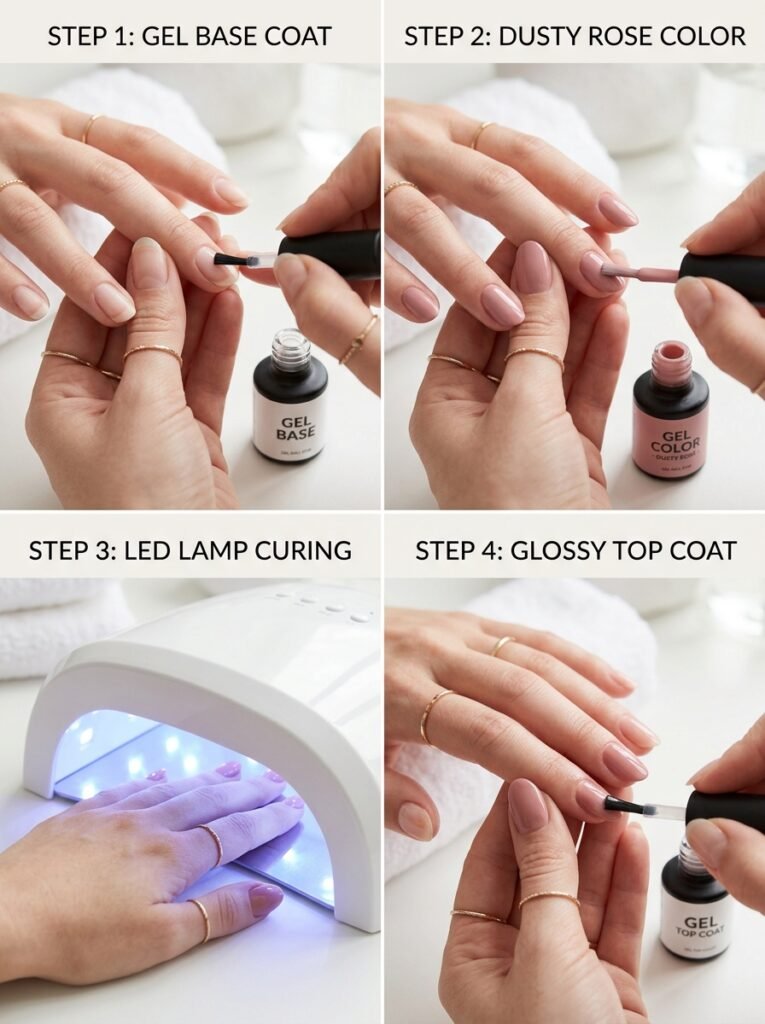
Apply base coat in a thin, even layer. Start about a millimetre from the cuticle, which prevents flooding the cuticle line and the subsequent lifting that causes. Thin means thin: if the base coat is thick enough to see pooling at the edges or the brush is leaving drag marks, it is too thick. Cap the free edge by running the brush across the tip of the nail. Cure under the lamp for the time specified by your base coat’s instructions, typically thirty to sixty seconds under an LED lamp.
Apply the first colour coat. Same rules: thin, start from near the cuticle without touching it, cap the free edge. Gel colour in two thin coats almost always looks better than one thick coat. One thick coat is more likely to cure unevenly, shrink at the edges, or stay tacky underneath even after the lamp time. Cure after each colour coat.
Apply the second colour coat following the same technique. Cure.
Apply top coat in a thin, even layer, capping the free edge generously since the edge is where wear starts first. Cure according to the top coat’s specified time, which is often slightly longer than the colour coat time.
After the final cure, wipe the nail surface with a lint-free wipe dampened with isopropyl alcohol to remove the sticky inhibition layer that is a normal part of the gel curing process. This reveals the high-gloss finish underneath. If your top coat specifies no-wipe, you can skip this step.
Getting a Finish That Actually Looks Salon Quality
The technical steps produce the durability. The finishing details are what produce the salon look that makes at-home gel genuinely comparable to professional work.
Flooding the cuticle is the most visible beginner mistake and it is the one that makes at-home gel look obviously DIY. The gel should sit on the nail plate only, with a clean margin between where the gel ends and where the skin begins. Getting this right requires slow, controlled brush strokes and sometimes letting a flooded section dry in the air for a few seconds before curing, which gives you a brief window to correct the placement before it sets.
Thin, even layers on the nail surface rather than in the centre only is the second adjustment that separates salon results from home results. A common instinct is to deposit more gel in the centre of the nail where coverage feels most important. The result is a gel manicure that looks slightly raised or uneven in the centre. Distribute the gel evenly from edge to edge and the cured result will be smooth and flat rather than domed.
Capping the free edge on every single layer is not optional for durability. The tip of the nail is where peeling and chipping begin, and every layer of product sealed across that tip edge adds to the barrier that keeps everything intact.
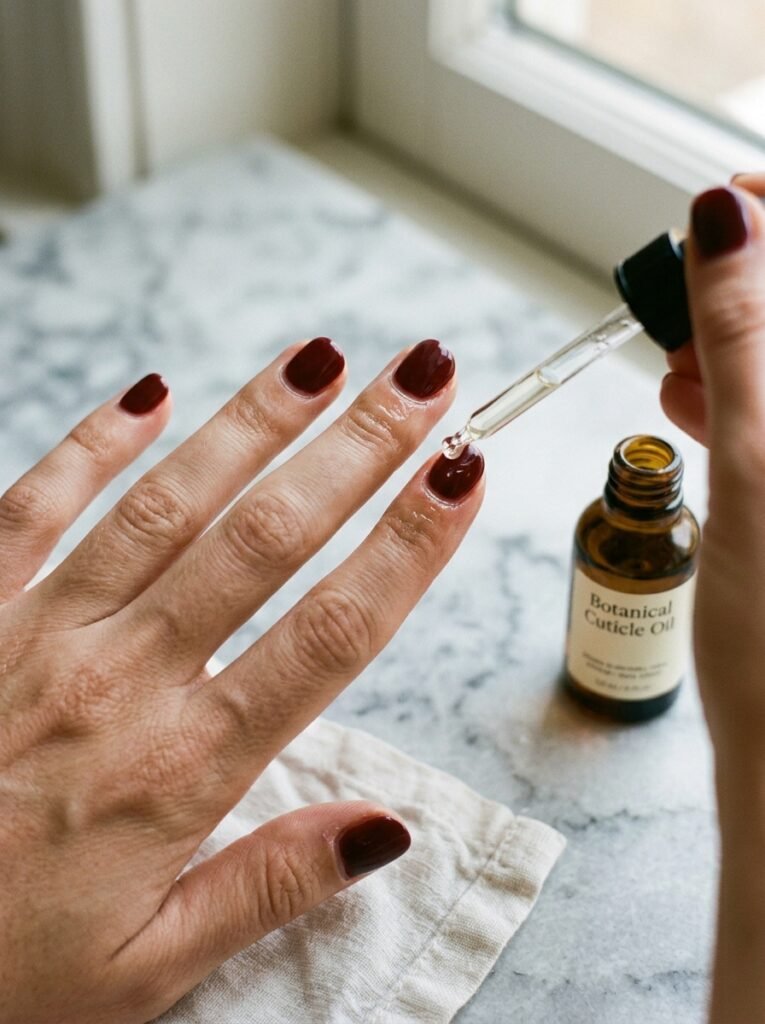
Cuticle oil applied after completion and consistently throughout the duration of the manicure keeps the surrounding skin healthy and nourished and makes the overall manicure look more professional and well-maintained.

How to Remove Gel at Home Without Wrecking Your Nails
Gel removal done incorrectly causes the nail damage that gets attributed to gel polish itself. Peeling gel off the nail does not just remove the gel. It removes layers of nail plate along with it, causing the thinning and weakness that makes nails feel damaged after gel use. The acetone soak method, done properly, removes gel with essentially no nail damage.
Lightly buff the shine off the top coat surface. This allows the acetone to penetrate the gel rather than sitting on top of a sealed surface.
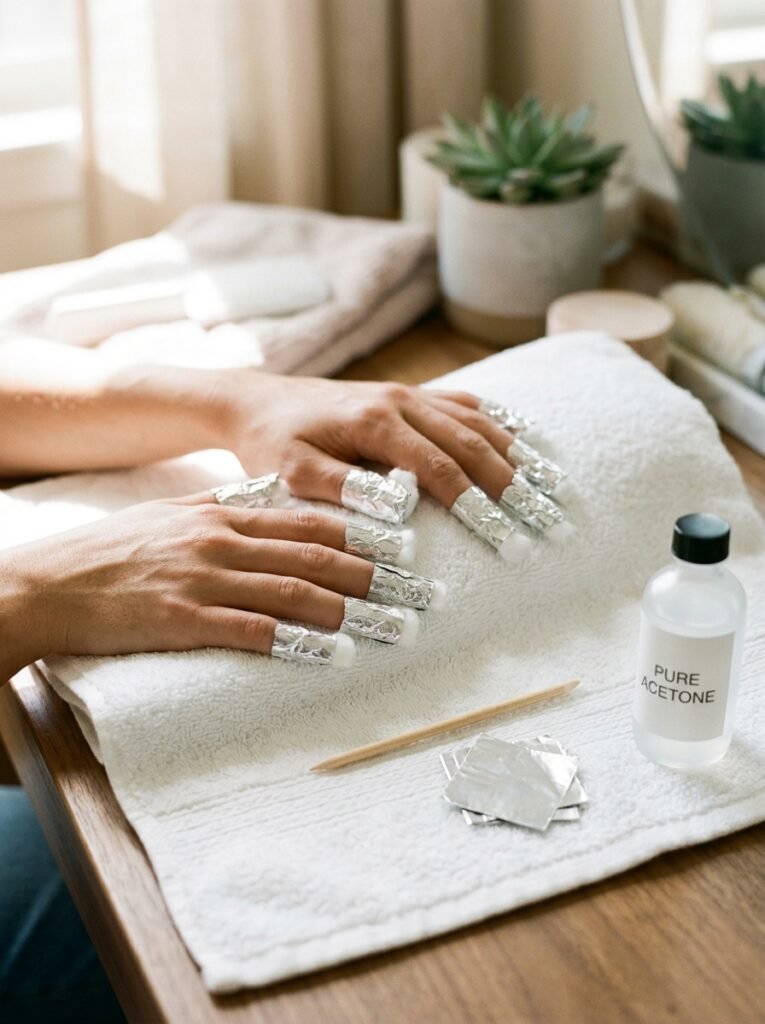
Soak a small piece of cotton in pure acetone, not acetone-based remover, which is diluted and takes much longer. Place the soaked cotton directly on the nail and wrap the finger in a small piece of foil to hold it in place. Repeat for all ten fingers.
Leave the wraps on for ten to fifteen minutes. After that time, the gel should have lifted away from the nail surface and will slide off easily with a gentle push from a cuticle stick. If significant resistance is felt, re-wrap and wait another five minutes rather than forcing it.
Avoid picking, peeling, or scraping with force. If the gel is not releasing, it needs more time in the acetone, not more pressure from a tool.
After removal, apply cuticle oil generously and let the nails rest for a day or two before the next application if they feel at all sensitive or thin. Consistent use of nail-strengthening base coat and cuticle oil between applications keeps nails in good condition for ongoing gel use.
Making Your At-Home Gel Last Two to Three Weeks
Durability beyond the first week is where at-home gel either earns its comparison to the salon or fails to. The preparation and application steps above set the foundation, but how the nails are maintained during wear matters too.
Avoid prolonged water exposure in the first few hours after application. Gel is fully cured once it comes out of the lamp, but the bond between the gel and the nail plate continues to strengthen over the first day or two. Wearing gloves for washing dishes and cleaning during this period significantly extends the wear time.
Apply cuticle oil daily. This is the maintenance step most people skip and should not. Dry cuticles and nail beds lead to product lifting at the edges. Cuticle oil keeps the margin between your skin and the gel flexible rather than dry and prone to peeling back.
Treat your nails as tools with consideration rather than tools for use. Opening packages with your fingertips, using your nails to peel labels, or picking at things with your nails creates micro-stress on the gel at the free edge that accumulates into chips and breaks. None of this means treating your nails delicately to the point of inconvenience, but conscious habits at the tips add days to the wear time.
When minor lifting appears at a cuticle edge, a tiny drop of gel glue or nail glue pressed down and held flat can extend the life of the manicure significantly rather than prompting a full removal and redo.
Common At-Home Gel Mistakes and How to Fix Them
Knowing what goes wrong and why makes troubleshooting straightforward rather than guesswork.
Gel lifting within the first few days almost always traces back to preparation. Oil or moisture on the nail plate at the time of application, cuticle skin that was not properly pushed back, or skipping the dehydration step are the most common causes. The fix is not a better gel or a different lamp. It is starting over with more thorough preparation.
Gel that is sticky or remains soft after curing is either undercured or using a gel that is incompatible with the lamp’s wavelength. Check that your lamp and gel system are compatible and that you are curing for the full time specified. A lamp that is underpowered or has begun to degrade will also cause undercuring.
Colour coat that looks streaky or uneven after the first coat is not a problem: it is the expected result of a single thin colour coat on many gel formulas. A second thin coat resolves this. Applying one thick coat to compensate produces a different set of problems.
Gel flooding into the cuticle that has already cured is removed by gently lifting it with an orange stick or cuticle pusher before it cures. Prevention is easier than correction: slow, controlled brush strokes with a brush that is not overloaded with product.
Dull or matte finish after wiping the inhibition layer means either the wipe had too much alcohol (which can dull some formulas), the top coat was applied too thinly, or the specific top coat formula does not produce high gloss. Trying a different top coat brand often resolves persistent dullness.
Frequently Asked Questions
How long do at-home gel nails actually last compared to a salon? With proper preparation and application, at-home gel nails last two to three weeks, which is the same duration as professional salon gel. The difference in longevity between salon and at-home results comes almost entirely from preparation thoroughness rather than product quality, since professional-grade products are available for home use.
Is at-home gel safe for your nails? Gel applied and removed correctly causes minimal nail damage. The nail damage commonly associated with gel use almost always traces back to improper removal, specifically peeling or picking the gel off rather than using the acetone soak method. With correct preparation, application, and removal, at-home gel is no more damaging than salon gel.
What is the best gel nail kit for beginners? A complete system from a single brand is the strongest recommendation for beginners because it eliminates product incompatibility as a variable. Gelish, OPI Gel Color, and ORLY Gel FX are consistently reliable starter systems with wide colour ranges and strong adhesion. Pair any of these with a thirty-six-watt LED lamp and the results are genuinely professional quality.
Can you do gel nails on short nails? Absolutely, and gel works particularly well on short nails because it adds a layer of hardness that helps short nails resist breaking and chipping. The technique is identical to longer nails. Gel is also one of the best ways to grow nails out, as the hardened coating protects the nail plate from the breaks that prevent growth.
How often should you take a break from gel nails? There is no universally agreed upon schedule, but giving nails a week or two off from gel every few months allows you to assess the health of the nail plate and treat any thinning or dryness with oil and strengthening treatments. If nails are consistently healthy, have good thickness, and show no signs of dryness or brittleness, continuous gel use with careful removal is generally considered safe.

The Real Value of Learning This Skill
The first application takes longer than five minutes. So does the second. By the third or fourth time, you will have developed enough familiarity with the steps and the feel of the products that the whole process takes around forty-five minutes for a full ten fingers, which is roughly what a salon appointment takes once you factor in waiting and travel.
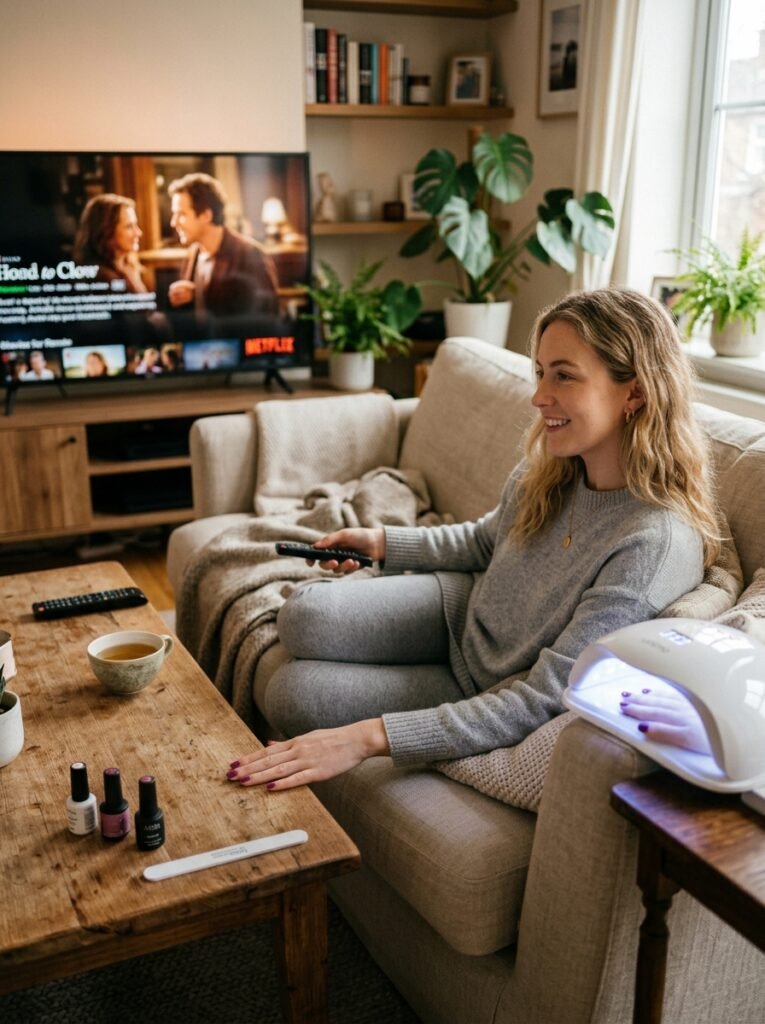
The difference is that forty-five minutes at home costs you about three to five dollars in product per application rather than fifty dollars and a tip. It costs no travel time. It happens whenever you want it to, on a Sunday evening while watching something, rather than whenever the salon can fit you in.
The nail industry is built on the idea that salon services are the standard and at-home is the lesser alternative. For some services, that is true. For gel nails, with the right system and a small investment in learning the technique, it genuinely is not. The results are comparable. The cost is a fraction. The convenience is significantly better.
That is a skill worth spending a few sessions to learn properly.